Monday, November 23, 2015

Product Review: Fresh Sugar Lip Treatment Sunscreen SPF 15

My personal preference for lipsticks is for it to be sheer and moisturizing. I really like those with a lip balm feel to it and one of my favorite drugstore brands has been long discontinued. 

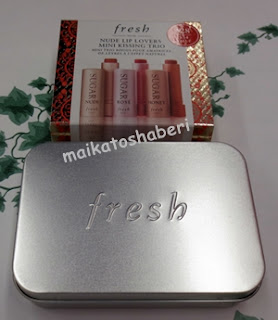
I'm really late to the Fresh bandwagon. I have only used their soy face wash in the past. Recently I decided to pick up the special mini trio that was only $28.00. There were 3 different colors, Nude, Rose and Honey. It comes in a really nice tin container which has a mirror on the inside cover. I'm already thinking of using the tin as a magnetic palette. It's a nice and compact size and I can layer 2 or 3 layers inside. I may actually have it replace the current tin that I'm using, although that one has sentimental value for me.


The back of the cardboard cover which lists specifics:


The lipstick tubes are tightly packed inside.


Colors and Swatches on a paper towel:


I absolutely am in love with this line! My absolute favorite is Rose. It comes off as a MLBB color. Honey is a little too warm for me so I gave it to Mai and she loves it. Nude is too pale for me but is perfect for wearing at home as a lip balm, which I often wear at home anyway. In recent month, my lips have become dry so I find myself reaching for a lip balm more often now. 

This line has colors that are sheer and some colors that are more bold. At this point in time, I would honestly love to replace all of my lipsticks with this line. A month or so from now I may find some other line that I will really appeal to me but for now, these lipsticks fit my personal preference for a lipstick. I will admit that I did go back and buy a full-sized tube in a different color. I'm not loving the color as much as it is a much brighter pink than I wanted but it's still wearable, especially with the holidays coming up and bolder colors can be easily worn. I need to go back and get a full size in Rose.

Have you tried Fresh Sugar Lip Treatments and what are your thoughts?

*Kat*

Thursday, November 19, 2015

Latest Fashion Discovery from Japan

I took a trip to Japan in mid September, which I thoroughly enjoyed. This time I was able to do a meet up with blogger K of Cosmeddicted. I had a great time meeting up with her and just spending some time eating and sightseeing.

From the time I landed in Japan and throughout our various travels, I noticed that many women were wearing gauchos pants. I remember back in the early 80's when this style was really popular and I had a couple of outfits which were favorites of mine. I was so happy to see that this style trend is coming back into fashion.

I found a pair that I really liked at Shimamura so I purchased it. I wore it recently and topped it with a simple crystal embellished top which I had in my closet and low heeled shoes, which I had recently purchased from Nordstrom Rack. I can see myself wearing these gauchos pants on a regular basis.


I would have liked to have spent time browsing and searching through all of the beauty brands but unfortunately I didn't have time for any of that. We were so busy and on the go, go, go that I honestly didn't have much shopping time. Hopefully the next time I go to Japan  I can spend some time beauty shopping.

*Kat*

Tuesday, November 17, 2015

Review: Sephora's VIB 500 Point Urban Decay Urban Vices Palette Set + EOTD

Hi Everyone!

I know it's been a very long while since I last blogged. There will probably be a future post on that but for now I'm very excited to blog about Urban Vices Palette set, which I received almost a week ago.

Last year there was a 500 point Urban Decay palette which I really like. One of the colors in that set has become a part of my regular rotation of colors that I use and fortunately, it is a regular stock item.

I happened to be surfing Sephora's website online and saw the Urban Vices set available for a 500 point VIB redemption. I immediately called my local store and found out it was also available in our store so I rushed out to get there.

The set comes in a big box with the Urban Vices design on it.


Inside the box is another box--a small box the size of the palette, again with the Urban Vices design on it.


The back of the box with some product information, including the shadow colors.


Inside the box is the actual palette. It is made of sturdy cardboard, which is something that I don't like but I can't complain since it was a bonus item using my points.


The colors are Dope, Hoodoo, Derailed and Smokeout. Also included is a mini 24/7 Glide-on Eye Pencil in Smokeout. I haven't had a chance to do some checking so I don't know if any of these are part of their regular line or not. I think that I have Smokeout in another palette but not positive. If anyone knows these colors availability, please comment and let me know.

I did a quick EOTD using Hoodoo on the inner 1/3 of my eye, Derailed on the outer 2/3 of the eye. I dabbed MAC's Light Violet Crushed Pigment in the center of the eyelid just to give it some dimension and added Smokeout to the out corners of the eyelid and along the outer 1/4 of the lower lashline. I used Dolly Wink Eyeliner pen to line my eyes.


Like last year's palette, I'm really liking this one. One can reason that this gift isn't worth it because 500 points is equivalent to $500.00 spent. I like to look at it as a bonus, despite the value of the points because without the program, I wouldn't be getting anything. I think that with any reward program, one will never get full value of what their points were equivalent to.

I can't believe that it's mid November already. Somehow, this year has flown by much more quickly than any other year.

*Kat*

Saturday, August 29, 2015

Purchase Review: Stila Illuminating Powder Foundation + Mini DIY

Powder foundation is a basic item in my makeup routine. I don't use it solely as a foundation but as a finishing powder. For a few years now, my main favorites come from Japanese brands--Maquillage and Coffret D'or since they come in moisturizing formulations. Recently though, I haven't been able to find a Maquillage powder foundation labeled as moisturizing so have been using Kanebo Coffret D'or Silky Pact UV Moist Keep. 

Due to a recent mishap and extenuating circumstances,(which I will explain a little later) I was deperately in need of a new powder foundation and decided on Stila Illuminating Powder foundation. I even found a color that almost perfectly matched the Coffret D'or one that I had been using.

Like many Japanese brands, the compact case is sold separately from the powder. I read many reviews on Sephora by people upset that they had to buy the case separately. It didn't bother me since that's the way I have been purchasing my powder foundation. I decided not to buy the case since I wasn't sure if I would like the product enough to use it as a daily basic.


The ingredient list: 


According to Sephora's website, it is a velvety powder foundation which leaves a luminous, transparent finish while protecting the skin with SPF 12. You can apply it dry for a light coverage or with a damp sponge for a heavier coverage.

This is a nice powder, but using it dry it really does provide a very, very light coverage. Using it damp does provide more coverage but on me it gets a bit cakey. Even dry with the light coverage, it seems to settle a bit in my fine lines. I don't feel that it provides enough coverage for me as the day wears on.

Another beauty blogger asked me recently what I use to conceal under my eyes. I use the powder foundation. One of the very few good points for me is that I do not have dark circles and puffy under eyes.


While I do have some discoloration, it is very light that I don't need to do heavy concealing.(I do need to conceal the freckles though.) For my under eyes, all that I do after I apply foundation, is pat another light layer of foundation under my eyes and then set it with the powder foundation. 

The Stila Illuminating Powder foundation doesn't work as well as Coffret D'or for me but it's a good backup in case of an emergency. So what was my mishap? I had hit pan on my Coffret D'or powder foundation and had it at the point where the bottom half was pan and the top half was powder. I had to be out working all day and knew that I would be needing a touch up before heading to another function so I packed it into my makeup case. Unfortunately because it was only half a pan, it ended up cracking and breaking into many pieces. I had been debating several weeks before on whether to order a new one for backup but held off thinking that I would be traveling to Japan in a few months. To top it off, when I went to my online vendor, Ichibankao, for this product, she was closed for summer vacation and it would be a couple of weeks before she returned and opened business again. This is what made me decide that I needed to find a substitute until I could place an order.

In the meantime, I decided to empty out the Coffret D'or pan and compact.


I decided to try to repress the broken remains of foundation. To my delight, it worked! I used the 44mm round pan to press the broken product and it was just the right size.


As you can see, it is smaller than the original compact size and it fits perfectly into the travel palette that I am using to travel with. It ends up being perfect timing for me to eliminate more bulk by not having to take the original compact case.

So my final conclusion on the Stila Illuminating Powder Foundation is that it will be a nice backup to have to use in emergencies. It just doesn't cut it to replace the Coffret D'or powder foundation since Coffret D'or gives me more coverage without caking or settling into fine lines and lasts on me for hours. Besides, I LOVE the case that I got when I first started using Coffret D'or.


Isn't it pretty?!

*Kat*

Sunday, August 2, 2015

Purchase Review: Milani Eyeshadow Primer

Ever since my friend reviewed Milani Eyeshadow Primer on her blog here, I've been wanting to test it out. I finally picked it up at WalMart and started using it a week and a half ago.


Ingredient List:


You can click on the picture to enlarge the list.

Up till now, my HG eyeshadow primer is Urban Decay Eyeshadow Primer Potion. I must say that I have to agree with Cosmeddicted in that this eyeshadow primer is great! Let's do some comparisons.

Milani Eyeshadow Primer:
.30 fl oz/9 ml
$6.57 at WalMart

Urban Decay Eyeshadow Primer Potion:
.33 oz
$20.00 at Sephora
.16 oz (mini)
$12.00 at Sephora

Milani offers a much better value, being it's a drugstore brand. A big negative for me is that Urban Decay has discontinued the squeeze tube, which is what Milani has, and has gone back to having a doe foot applicator.

Cosmeddicted says that she has oily eyelids, which is why she creamy primers don't work well for her. I use Mezaik Stretch Fiber to create a double eyelid thus I can't use anything creamy, which will lift the fiber. Urban Decay has worked well for me but I am finding that Milani works well and in fact, works better. It works better because recently with Urban Decay, I've been finding that the darker eyeshadows are going into the crease where the stretch fiber is and creating a significant crease mark. It is obvious if I look down, some days being more obvious than others.

Urban Decay


With Milani, I haven't had much problems and am finding my eyeshadows applying quite nicely. My eyeshadows last just as long and well as when using Urban Decay.

Milani

FYI: the Milani EOTD was done using Urban Decay's new Naked Smoky Palette. Inner 1/3 of eyelid I used Half Baked from Naked 1 palette, middle 1/3 is Radar and outer 1/3 is Smolder. I am liking this new Naked Palette.

*Kat*

Wednesday, July 22, 2015

Purchase Review: MAC Prep + Prime CC Colour Correcting Compact and Kat's Current Concealing Method Part 2

This is the 2nd part of my current concealing method. You can see part 1 here, which is the prior post.

Continuing on...

To set the concealer pencil on the large dark spot, instead of using powder as I did for the other areas, I now use MAC Prep + Prime CC Colour Correcting Compact in Recharge, which is an apricot colored powder. 


I have been using different forms of orange-toned powders for a long time now to try to conceal and set because using powder, even if it's translucent powder, shows up as a white spot when I apply blush.


After I apply the CC powder, I set my whole face with translucent powder (Cle de Peau loose powder) and finish up my makeup routine, applying blush and lipstick.

This is after 10+ hours of wear:


As you can see, the combination of NUDESTIX concealer pencil and MAC CC concealer powder hold up very well. I only touched up my nose with some powder as it has been very humid here plus my nose has been a bit stuffy and I've been fussing with it with tissues.

MAC Prep + Prime CC Colour Correcting Compact is a pretty hefty-sized compact with 8 .0 grams/.28 oz of product. The compact itself is a mirrored, black hard plastic case.  For the amount of product that I use, it will take me a very long time before I will need to make another purchase.

I really like this powder as it is a matte powder. A lot of the other powders that I had been using had some shimmers in it. While in some ways shimmer is good in that it reflects the light away, it would sometimes still show up as a lighter spot when blush was applied.

So far, I'm quite happy with the results and will continue on until I find another product that piques my interest.

*Kat*

Monday, July 13, 2015

Purchase Review: NUDESTIX Concealer Pencil and Kat's Current Concealing Method Part 1

My nemesis is the large dark spot that is on the apple of my right cheek. I've reviewed a number of different concealers but my current favorite is NUDESTIX Concealer Pencil. I was a little apprehensive ordering this online from Sephora, sight unseen because I'm really particular about swatching colors to match my skin tone, which isn't the easiest to find a good match for. Unfortunately, the stores locally do not stock it so I had no choice. The sales person was really helpful though and actually went to check the foundation that I'm using to match the color of the concealer to. She matched it to Medium 6, which ended up being a great match for me.


While I feel it's not necessary, it comes in a tin container. The pencil is a chubby stick, which is creamy and is not self sharpening.


Also included in the container is another cover, which opens up into a sharpener. This is nice and handy for use when traveling. The inside cover of the tin is a mirror. I can see converting this into a magnetic palette!

The concealer is nicely pigmented with nice coverage. It's so simple to use, just color it on like you did as a child coloring pages with crayons. You don't need much to get good coverage, which is good because it can get quite heavy if you use too much.

Bare face:


Foundation only (Sorry, I don't know why the picture is so white!) FYI, I use BareMinerals Bare Skin Serum Foundation in Bare Beige 8 :


Concealer applied:


I then set the concealed areas with powder, except for the large dark spot.

I like the ease in applying this concealer. It's really quick and I don't have to use extra brushes to apply and blend in. It will also be very easy to travel with. It is a bit pricey at $24.00 but it works well and a little goes a long way. My only wish is that there was the option to purchase just the pencil instead of buying the whole set. I just received my backup order and it seems like such a waste to have gotten another tin and another sharpener.

I had previously done a review of a similar type of concealer, which was from Daiso. You can read it here and see the similarities and differences between the two.

My next post will be the finishing touches of concealing.

*Kat*

Wednesday, July 8, 2015

DIY Vitamin C Serum

Many readers out there know that I've been trying to diminish the freckles on my face and most especially this one large, dark, ugly spot on the apple of my cheek. While I've been trying different products for years, these are the products that I have tried over the last year:


I am sad to report that none of them have been effective. Probably the product that worked the best would be the Rodan + Fields line. It is quite pricey and then I was told that I should add this AMP roller since it hadn't been as effective as hoped. I decided that I didn't want to spend more money as I had already invested a good amount for a product that didn't do what I wanted it to do. I'm not saying that any of these products are bad, just that on me, it wasn't effective. The one thing that I did notice, especially with the Rodan + Fields line, is that after I stopped using it and didn't use any other whitening/brightening product my complexion did start to look a little dull over time. Perhaps sometime in the future I may consider revisiting the line and include the AMP roller.

In the meantime, I started searching around for a new product to try and discovered the benefits of Vitamin C. We all know that ingesting Vitamin C is good for your body with it being full of antioxidants. I learned that Vitamin C plays a major role in the production of collagen. As we age, our skin naturally loses this vital nutrient over time. This is why we also lose that nice elasticity in our skin that we had in our younger years. As we lose the Vitamin C and the collagen breaks down, the wrinkles start to appear. Topical Vitamin C,whether in the form of serums or lotions, is the best form for battling the signs of aging. It can help to brighten dull skin, prevent wrinkles and lighten dark spots. (NOTE: The products that I used did have Vitamin C properties in it although it didn't help to lighten dark spots much.)

I then found several blogs with DIY Vitamin C serum recipes. Vitamin C serum is actually very easy to make and quite economical! Before I refer to those recipes, let me show you the items needed to make the serum:


Your main basic items that you will need is distilled water, L-ascorbic acid (vitamin c powder), cosmetic grade oil and an amber dropper bottle. pH strips have been recommended but I haven't bothered to get these since I know that I won't bother testing. You will also need a cleansed and sanitized little bowl and utensil to make and mix the serum in.

I first tried a recipe that I found on Primally Inspired, which was a recipe developed from and column written by Jennifer from Jenni Raincloud. I initially liked the ease of this recipe as it was equal parts of items, which made it easy to remember.

I then found another recipe on Oatmeal With A Fork which I liked a lot better. The good thing about this recipe is that it's broken down by strength of the solution. Since I had already been using products, I went straight to the highest strength level.

The recipe by Jenni Raincloud, as I mentioned, was easy to remember because it was equal parts of each ingredient. My main dislike for it was that the L-ascorbic acid did not dissolve and the serum remained quite gritty. I felt that it needed to have more liquids for it to dissolve properly so I tried out the Oatmeal With A Fork recipe since it uses no more than half the amount of L-ascorbic acid as compared to the liquids. 

My first attempt, I used glycerin for the oil. It felt good and I could keep it in the refrigerator and it wouldn't harden. It felt so refreshing to put the chilled serum on. The L-ascorbic acid did dissolve well, which is great! However, after using it for almost a week, I discovered it was way too emollient for me as my skin started to breakout a slight bit. It also turned color and started to get a slight funky scent after 4 days. I then tried using jojoba oil instead. I can't refrigerate it as it hardens. This worked out okay but I didn't care too much for the slight scent of the jojoba oil, which got progressively stronger as the days wore on. I then decided to use fractionated coconut oil. This is unscented and I like the anti-bacterial properties of fractionated coconut oil. This also can't be refrigerated but it does seem to last the longest. After 5 or 6 days, it does start to slightly turn color by getting cloudy and a very faint scent does start to develop. This is when I know it is time to discard and make a new batch. At first I doubled the recipe but since you will need to discard and replace with a new batch within a week, the regular recipe amounts are more than sufficient, even if using it twice a day.


It has started to get quite humid here so I decided to cut the fractionated coconut oil in half and increase the distilled water by that amount. I don't think that it's affected the effectiveness any and it is a much lighter hydrating serum that is great for use in the current weather. If you do decide to use fractionated coconut oil, please make sure that it is unscented. I couldn't find any here locally, so I had to purchase it online. The post by Jenni Raincloud has a link for cobalt blue dropper bottles. It is so much prettier than the amber ones so I may have to get a couple.

I have found that using this DIY serum has nicely evened out my skin tone. My face is definitely brighter and looks smooth. I can't say that it has lightened any dark spots but it may take more time. Even if it doesn't lighten the spots, it's still working effectively in other areas. I've even noticed that my neck looks much less crepey.

I am so glad that I looked into this much further and discovered how easy it is to make your own Vitamin C serum for just cents and a little time! 

I hope that you haven't gotten tired of seeing DIY posts.

*Kat*

Saturday, July 4, 2015

Purchase Review: Lux Sakura Dream Shampoo and Conditioner

Back in February or so, Yumeko of A Dream of Tokyo posted a photo of a new, limited edition Lux shampoo and conditioner on Instagram. Being that it was soon sakura season, many limited edition sakura items come out and Sakura Dream was one of them. 


I love sakura and have used Lux hair care line items in the past so I knew that I needed to attempt to get this set to try. Almost immediately, I texted my son and daughter-in-law and asked them if they could get this for me if they came across it. They actually live in a rural area in Japan so not all items get to their area. A couple of weeks later, they texted me and said that they found it and bought it for me. I was going to wait to pick it up from them later this year but it just so happened a friend was coming to Hawaii in early June for a conference and wanted to meet with us. My son asked him to bring this with him for me.

Just recently I discovered that this is available for purchase in our local Donki store for $19.99, which is probably double what it costs in Japan. I also found that there are 3 different formulations, one of which I don't remember. I also do not know what this Sakura Dream line is beneficial for. The other formulation is for damage repair. The new formulation on this line is that it is silicone free. Other silicone-free shampoos that I have used in the past do not lather up well but I'm finding that this one still lathers up rather nicely. It could also be that I've gotten used to using Wen, which does not lather up at all. Here's the ingredient list, which you can click on to enlarge:


I am loving this shampoo! Sakura Dream has a nice, light fragrance, which is great for me who doesn't like strong scents. It cleans well and although it doesn't feel like it's conditioning well, it really is because when I run my brush through my wet hair, it just glides right through. I blow dry and flat iron my hair afterwards and my hair feels so soft and silky. I'm also very impressed by the fact that there is fullness to my hair! 

My one concern was that every time I use a Japanese brand hair care product, my scalp gets irritated. It itches and hurts. I've tried Lux, Shiseido Tsubaki line and even Spice Hair Treatment and end up with the same result. After using Lux Sakura Dream line consistently for 3 weeks now, I am happy to say that I do not have any problems. I'm assuming that it's the silicone that is in the other hair care items that is causing the irritation.

I love this set so much that I actually went out and paid the $19.99 for backups in my stash--I think that I bought 6! Since it's limited edition, I'm pretty sure that if I wait until I go back to Japan, it will not be there. I need to find out if they have the set as part of their regular line because although I love the limited Sakura Dreams, if they have it in a regular edition, I'd buy that and not have to worry about stocking up so much.

Today's the 4th of July in America. How will you be celebrating? As for me, I will be working the 1st half of the day and the 2nd half I will be spending time with my mother-in-law.

*Kat*

Wednesday, July 1, 2015

Using My Stash February - June 2015

It's been so long since I last did a "Using My Stash" post! I'm pretty sure that there might have been more items used but I couldn't find the containers.

Skincare


Skincare items is what I used up the most.
Rodan + Fields Reverse Line Deep Exfoliating Wash, Toner and Skin Lightening Treatment. I gave this line a good run and it didn't do what I wanted it to do, which was to remove freckles and dark spots.
Kose Hyaluronic Face Lotion. I'm not extremely particular about my face lotions as long as they are moisturizing. This one worked well and I believe isn't too expensive. I have several different face lotions in my stash that I need to use so I don't believe that I'll be making any purchases in the near future.
Nivea Soft Moisturizing Cream. I used this as an extra lotion. I really liked it and it was quite inexpensive. Since summer with high humidity has hit, I will not be using an extra moisture lotion for a while. I will most likely pick this up again but I have to admit that I have other heavier moisturizers in my stash that I need to use.
Naive Facial Cleansing Foam. I love Naive cleansers! I have several others as backup in my stash.
DHC Q10 Face Cream. It's a nice cream. Not sure if I'll repurchase as it didn't stand out as compared to other face creams that I have.
Nature Republic Argan 20 Mask Sheet. I have so many masks in my stash to use that I don't have to buy any for a long, long time. This was a nice mask to use and I think that I do have more in my stash.

Makeup


Bare Minerals BareSkin Pure Brightening Serum Foundation. This is my HG foundation! I really love it. I think that I am almost done with a 2nd bottle.
Embryolisse Lait-Creme Concentre. This is a moisturizer and primer in one. I was using it mainly as a primer and really liked it. I am currently using it as only a moisturizer and it works very nicely that way too. A little goes a long way and although I have only recently started using a 2nd tube, I think that I need to buy another one to put into my stash.
Urban Decay Eyeshadow Primer Potion. This is another HG product for me. This tube took me a whole year to use up so I was thinking of replacing it with a smaller tube, thinking that I will be using fresher product even though it's more cost effective to buy the larger tube. I happened to find the larger tube in my stash as well as a smaller tube so I'm set for over a year.
K-Palette Real Lasting Eyeliner 24h. This has also been a HG product for me. I have a number of these in my stash. I was recently given a Dolly Wink eyeliner. It works exactly the same as K-Palette but I think that the tip is a little narrower so I like the way it lines my eyelids.

Sunscreen


Hada-Labo UV Whitening Emulsion is one of my HG products. I love Japanese brand sunscreens as it doesn't feel or smell like sunscreen. It also has high SPF, which I like. I have many of these in my stash.

Brush Cleansers


Sephora Daily Brush Cleaner. I like to use this everyday. This new formulation is great in that it cleans the brushes well and is so quick drying. Brushes stayed damp when using the old formulation.
Daiso Puff and Sponge Detergent is my all-time favorite for deep washing my brushes on a weekly basis. Or at least I try to wash them on a weekly basis. Very inexpensive and effective as a brush cleanser.

Not very many items considering that this is for 5 months. I still have so many items in my stash that need to be used and loved. It is slowly whittling down though and I'm happy that I've been doing this.

*Kat*

Friday, June 26, 2015

Purchase Review: Rohto Hada Labo Perfect UV Gel

I love Japanese sunscreens. For some reason, Western brands and I do not do well together. The Japanese brands (and Korean brands) that I have used, all are like milk/moisturizer as far as texture and feel. The Western brands have a feel and scent that is, to me, typical of sunscreens.

My all time favorite is Rohto Hada Labo UV Whitening Emulsion.I have at least 5 backups in my stash. Recently, though, I learned of a new sunscreen that intrigued me and I knew that I needed to try it. Rohto Hada Labo Perfect UV Gel.


The reason why it intrigued me because it has 5 beneficial properties to it. It is a lotion, emulsion, essence, makeup base and sunscreen all in one. You can cut down using all those various products and use only this one product. It's a time saver!

I've been using this for nearly a week now and I really like it! The texture isn't milky and runny like the other sunscreens but comes out in a soft gel or cream texture. Unlike the other emulsion formula, this one does go on feeling a little less like a moisturizer since when you apply it and massage it in, eventually there is some "pull" to it. Sorry, I'm not sure of the word that I should use. I believe that this is the makeup base/primer element to it. 

My skin feels moisturized enough although the weather here has become quite hot--definitely feeling the tropical climate. Despite the fact that the humidity has risen and I'm finding myself perspiring more, my foundation seems to stay in place and not melt off or fade. I'm really glad because nothing looks worse than melting foundation. This is a keeper and I'll definitely be getting more.

This sunscreen is fragrance free, color free and mineral oil free.

What's your favorite sunscreen?

*Kat*

Tuesday, June 23, 2015

Saturday Brush Washing

I normally try to wash my makeup brushes on every Saturday. Two Saturdays ago was the first Saturday that I didn't have to work in a few months. It was pure bliss having two days off! Unfortunately, I had to work this past Saturday again. The first order of the day was to wash my brushes that were badly in need of a washing. (I do clean my brushes daily using a daily brush cleanser.)

Daiso Puff and Sponge Cleanser has been and is still my favorite cleanser. It cleans the brushes very well and is so inexpensive. I know that many people have been loving the Beauty Blender Solid Cleanser and I'll admit that it was good but I still prefer the Daiso one. The other thing that I use when cleaning my brushes is a nifty little gadget that is actually meant to clean your pores. I can't remember for sure but perhaps it was for blackheads? It's a soft rubbery pad with tiny little "fingers" to help scrub. I find it perfect for scrubbing my brushes while washing and rinsing it off.


This gadget was given to me by a friend a few years ago. I've been using it for almost that long to wash my brushes and have not had any adverse effects to the brush bristles. I will need to pick up more of both the cleanser and the little scrubby thing during my next Japan trip.

My happy brushes:


How often do you wash your brushes?

*Kat*

Friday, June 19, 2015

TKB Trading and Silk Naturals Review

With all of DIY that I've been doing, I thought that I'd share my shopping experience and some of the products that I purchased recently from two different companies.

I first learned about TKB Trading years ago when I was into soap making. At that time, I had resources here locally so I ended up not doing any ordering from them. The popularity of soap making here has dropped dramatically and there are almost no resources but unfortunately, I am also not into making soap any more. 

I mainly ended up at the TKB website because I wanted to buy pans. That's when I discovered that they have a nice selection of micas and pigments to make a variety of different makeup items. I did two or three hauls within a 2 week period and this is most of what I ended up with:


I decided to start off with getting the press packs instead of just the tins. The press pack comes with two pressing tiles, a tamping tool (a pressing tile with a handle) and 9 pans. Just as a side note, the pans that TKB sells are made a tin and not aluminum. Be aware that tin will rust if there is prolonged exposure to water. Tin is magnet responsive and sticks very well. Aluminum pans will not rust but are not magnet responsive so you will need to stick a magnet onto the bottom of the pan. TKB does not sell aluminum pans. 

I bought the 57mm Round Press Pack, 44mm Round Press Pack, 26mm Round Press Pack and 24 x 21mm Rectangle Press Pack. The 57mm is quite large and I have no idea what I'll do with them. Maybe if I ever get into doing pressed powder or pressed powder foundation, I'll use that pan. The 44mm round pan is the perfect size for pressing blush into. I think that the 26mm pan is that one size that we pretty much consider standard as it is the same pan size as MAC pans. The 24 x 21mm rectangle pan is slightly smaller than the 26mm round and I totally love them! I actually prefer rectangle or square over round, even with my storage containers. Rectangle or square fit into refrigerators and cabinets so nicely whereas I feel that round containers waste some space.

I felt that while I was sure that I could find properly-sized round items to press with (like a quarter for the 26mm pan), the rectangular one would present a little more difficulty. For this reason, I decided to just buy press packs for all of the sizes this first time around. I have since ordered a 100 pack of the 24 x 21mm pans.

I could not find fractionated coconut oil locally so I had to place an order for it. It's an emollient oil which is also edible. It has many cosmetic uses but the main reason I bought it is to use it as a binder. It is non-greasy, colorless, odorless and tasteless. It is also anti-bacterial, which means the shelf life is forever. One great tip that I learned from youtuber/blogger Beauty Newbie is to make a mixture of alcohol and fractionated coconut oil in a spray bottle. We all have eyeshadows and blushes that kick up a lot of product and leave a powdery mess in the palettes. You can spray this mixture on and let it dry. It helps to tone down how powdery the product is.

Now for the micas...they are packed into ziplock bags. You can purchase sample size, which is approximately 6 grams all the way up to 1 pound! I purchased several in the 1 ounce size for only $4.00 each. I was surprised by how much mica there is! I think that I may be set for life! I did purchase a couple of the sample bags at $1.50 each and they are more than sufficient too. I think that you can get at least 2 26mm pans. Such a bargain! The product is a space saver being in the ziplock bags but it can get messy.

One of the colors that I bought, Davy's Gray is beautifully pigmented. I decided that I wanted to use it to make a couple of lighter colors to get a gradient eye effect.


Davy's Gray is in the top row, last pan on the right. The 2nd and 3rd pans are also Davy's Gray but mixed with Satin Pearl to make a light shade and a medium shade. The whole top row and the last pan on the bottom row are all TKB micas. This EOTD was done using all of the colors on the top row.


Great pigmentation and they blend well.

TKB's service was exceptional! I received my orders within a week of placing it. I even asked them questions via their "contact me" page and they were very helpful. I will definitely be ordering from them again soon!

I ended up discovering Silk Naturals because I had hit pan on my MAC Seedy Pearl eyeshadow. When I went to purchase another one, I discovered that it was discontinued! Thus began my online search for a dupe and this search led me to Silk Naturals. They have a wide array of beautiful ready-made colors! There are also many dupes to popular brands such as MAC and Urban Decay. The eyeshadows that I purchased were $4.50 for 3/4 tsp, packed in a 5 gram sifter jar. The blush that I purchased were $6.50 for approximately 1 1/2 tsp. packed in a 10 gram sifter jar. For every purchase over $10.00, you get a free eyeshadow packed into a 3 gram sifter jar. 


The site provides more indepth information about the colors that you are looking at, such as color family, finish, opacity, shimmer scale, etc. This is good information to know because pressing matte colors are difficult. I'm going to have to try my hand at it one of these days but from all that I've read, it can be hit or miss.

To press eyeshadow into either the 24 x 21mm pan or 26mm pan, it will require close to 2 containers of eyeshadow. To press the blush into the 44mm round pans, it will also require 2 containers of blush. Definitely more pricey than TKB but very much well worth it. I purchased 3 containers of Flirt Blush and used 2 and part of the 3 container to press. I purchased only one container of Be Mine blush and was too anxious to order more before pressing so I pressed only that one container. 


Wouldn't you know it...it turns out to be my absolute favorite color! I have to purchase more so that I can press another pan and have it be a full pan.


Be Mine is described as a pinky rose color with a neutral tone. 

I received excellent service from Silk Naturals as well. Again, my purchase was received within a week of placing the order. I will definitely be ordering from them again. It's so difficult to decide which colors to buy!

I have several of the free mini eyeshadows from my purchases and someone gave me some. I want to press them so I think that I'll have to purchase the 15mm mini round pans from TKB. 

I have Barry M products and have heard of Shio Cosmetics and Fryrinnae. Fryrinnae is not pigments but loose eyeshadows. Has anyone had experience pressing these and can give me tips? I'm looking into possibly purchasing from them. Any other recommendations sources to purchase micas, loose eyeshadows or pigments to press? I'm totally hooked!

*Kat*