Tuesday, September 27, 2011

August and September Brush of the Month Purchase

I decided to combine my August and September brush purchase because I wanted to try out a new line of brushes and knew that I would be purchasing more than one brush. This new line (new to me) is Crown Brush, which I first heard about from Miss Kei Kei's blog in this post.

Crown Brush has a wide array of brushes with 15 different lines. I chose 6 different brushes from 4 lines. I also picked up a package of Mini Curved Spatulas, which are the exact same spatulas that Sephora uses.

From left to right: Perfectly Pink Blending Fluff, Perfectly Pink Deluxe Round Crease, Duo Fiber Deluxe Shadow, Luna Badger Deluxe Crease, Italian Badger Bullet Crease and Italian Badger Chisel Deluxe Powder Dome.


The Italian Badger Chisel Deluxe Powder Dome is really thick and full. When I washed it, some bristles fell out, which did not surprise me because it is so thick. Even after drying, a few more fell out but it hasn't shed any more since. I think that at the most one dozen bristles fell out. It also had a funky smell when wet--kind of the way a wet animal smells but using it, I haven't noticed the scent. I haven't had any other shedding problems with the other brushes. It is quite big and fluffy but slightly prickly at first use. With continued use, it's been getting softer.

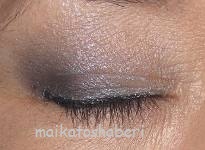
The Duo Fiber Deluxe Shadow brush is wider and bigger than I usually like to use as an eyeshadow brush but it works well if I use it to apply eyeshadow over my entire eyelid, from lashline to brow bone. It's a little too large for me to use as a regular eyeshadow brush, but it could just be because I have asian eyelids which do not have widely creased eyelids. I've been finding that I like Duo Fiber brushes more and more as I'm using shadows that are much softer and more pigmented.

The two brushes from the Perfectly Pink line are my favorites. Although I had originally planned on using the Blending Fluff to blend my eyeshadow colors together, it is is much bigger than what I normally use to blend. It does work really well with doing a light application of setting powder under my eyes.

As for the other 2 brushes, I haven't really used them consistently to be able to do a proper review of them.

Overall, I think that these brushes are of really nice quality and at very reasonable prices. Shipping is quite reasonable too. I had a really nice experience placing my first order with Crown Brush. I had a problem when I tried to check out so I called their customer service and the problem was fixed quickly. Shipping was also very quick. It took no more than a week from the time I placed the order till I received them. I will definitely be ordering more brushes from Crown Brush.

Crown Brush is available online to these countries: US, UK, EU, AU, MX, CA. When you go to their website, you choose which country, which is located near the bottom of the page.

*Kat*

Thursday, September 22, 2011

Quick Test Review: MAC Matchmaster Foundation and Pro Longwear Lipglass

A second blog post for me today. I usually don't do this but since I'm a bit behind on posts, I thought I'd do a bonus.

MAC's Matchmaster Foundation was available for sale today so I went down to check it out.
Picture from MAC website

The whole concept of the foundation is that it uses translucent pigments which enables it to match your skintone. Gone from this foundation is MAC's color numbering system using either NC__ or NW__. There is a coloring system to it but it's more for your skin's darkness rather than whether or not you are yellow toned or pink toned. It is supposed to be a moisturizing demi-matte finish with line reducing, soft focus powders. It is also supposed to be a medium buildable coverage.

I'm usually between a NC/NW25 to 30, with 30 being a little to dark for me. With Matchmaster, I would use a 3.0, which is comparable to NW22, NW25 and NC30. I googled and found a color comparison chart here at Footluxe.com. Since I knew ahead of time what color I matched up with, when I went into MAC, I was able to tell them what color I wanted to test out.

The MUA first applied Prep + Prime Refined Zone, which he said will mattify my skin. He also used Prep + Prime Fortified Skin Enhancer in Adjust, to even out the skin tone. He then used Select Coverup in NW 25 to cover my dark spots and under the eye. He said that it's really best to use concealer with Matchmaster Foundation because the coverage is on the lighter side due to the skin tone matching properties. I still thought that it was a light "medium buildable coverage".

The feel of the foundation is so light that it doesn't even feel like I'm wearing anything. With the concealer, I think that the coverage is quite decent enough. The color does seem to match well, which I'm really liking a lot. One thing that I personally don't like is my face being matte. I feel that it really brings out the fine lines. After several hours of wear, I do feel like my fine lines are showing and my skin actually feels a bit parched. There is absolutely no oil that I can feel. I think that this is partially due to the fact that I had to remove whatever makeup I was wearing with a makeup remover sheet. By doing this, I also removed whatever skincare products that I had on and no skincare products were applied before putting on this foundation. 


I was able to bring home a sample of the foundation so I will be able to give it a test after doing my regular skincare routine. I'm hoping that my skin will stay hydrated with my moisturizers under this foundation.

Also recently released (not sure if it was today as well or earlier) is MAC Pro Longwear Lipglass.

Picture from MAC website

This is a long wearing lipglass that is supposed to last six hours. It goes on smoothly and gives your lips shine and color. I used the color "Show Me', which is a mid-tone neutral plum. I loved the color but the feel of this is very typical of MAC's lipglass--sticky. I don't like my lips being that sticky. I thought that since it's long wearing that it might be transfer resistant but unfortunately it is not. I had sticky lip marks on my cup when I drank some water. The color has lasted, even after eating dinner although the color has faded significantly and the shine is gone. This will definitely not be on my "to buy" list.

Have you tried either of these products? What did you think?

*Kat*

New Goodies from Teizaku and Packing

I had gone to Las Vegas last year in October and again earlier this year in February. I can't remember exactly when it was but I had made a purchase from Teizaku for a handmade brush roll in a pink Charmmy Kitty print. I used to to travel to Las Vegas and love it so much. Recently Yumeko had posted some new brush rolls but this time in sakura print so I just had to get one. I also lucked out and was able to pick up an insulated water bottle holder/carrier.


These items are all handmade by Yumeko and sell out really quickly. She does an awesome job. All of the items that she makes and sells are entirely created by her, from the design of the product to the construction of it. She does not use commercial patterns or instructions. She also ships out really quickly and I can highly recommend her.

I really wanted to do this post yesterday but was laid up with a migraine. She posted about a pre-sale that she's having so please do check out her blog sale page here. I'm not sure what she still has available.

She also writes an awesome blog mostly about things in Japan. It's not only beauty related but she does posts on interesting places, travels and food. Please do check out her blog, A Dream of Tokyo if you like reading these kinds of writings.

I'll be travelling to Las Vegas again in October so the timing was perfect. I already have both my brushrolls thrown into my bag as well as the water bottle carrier. Yes, I'll be taking both brush rolls with me.

I don't know about most of you but one of the reasons why I don't like to travel is because of packing. I'm always afraid that I'll forget something that I really, really need. The result of this worry is that I often start packing 3 months or more before my actual trip. If I think of something that I will need I throw it into my suitcase or carryon. I'll pack clothes and unpack them as I weed out what I've over packed. I've actually only started packing a week ago so I'm really far behind. This is what my bags look like right now.:


The suitcase is actually a smaller suitcase and I think that I'm going to end up transferring everything into the large suitcase. Either that or I might keep it in that suitcase and pack that whole suitcase into the larger one. I'm not sure if I'll be doing much shopping in Las Vegas so I'm still debating on that. Normally I do pack my suitcase into my suitcase so that I'll have the extra suitcase to bring back everything. I travelled with only my one large suitcase in February and ended up regretting it. The result is that the suitcase in the picture was purchased in Las Vegas so that I could bring back everything. My luggage looks quite messy now but it will be nice and neat when I'm ready to leave. If anyone is travelling to Las Vegas in October too, please let me know and if the timing works out, maybe we can meet up.

*Kat*

Monday, September 19, 2011

Swap Review: Canmake Agebuto Mascara, L'Oreal Color Infallible

I'm back with another review! I'm so sorry for the lack of regular posts and reply to comments. It's been a bit hectic for me. There's quite a back up of things that I need to blog about too.

I recently did a swap with Lynn that I met via Twitter. She doesn't have a blog so I can't provide a link for you. I had an extra UD 15th Anniversary Palette that she wanted to purchase from me and after thinking about it, I asked if she would rather do a swap instead of PayPal me.

One of the items that I really wanted was Canmake Agebuto Mascara. I like their other two mascaras that I have--Gokunobi and Gokubuto but was really curious to try out this new release.


One thing that I didn't realize until after I applied the mascara is that it is a waterproof mascara, which I have been trying to avoid. For one thing, waterproof mascaras (especially Japanese brands) are difficult to remove without tugging and pulling at your lashes. I have also realized that they are quite drying and can make your lashes brittle with constant use.

Anyway, Agebuto promises you:

An upward curl that will last
Hyper volume effect
Lifts and separates lashes, fanning them out
Run prevention
Waterproof effect
Contains lash-conditioning agents
Wide spiral brush

I did try it without curling my lashes first but it didn't really help to curl my very, very stubborn lashes. The next day I curled my lashes first using my Koji eyelash curler and didn't use any mascara base first, which usually helps to keep my lashes curled. Normally when using waterproof mascara, I don't use a mascara base anyway.


I must say that I was very pleased that it definitely held my curl until I removed it for the night. I didn't experience any flaking or smudges from long wear and natural oils that occur as the day wears on. I don't know if it helped to fan my lashes out but it did seem to volumize it. I liked the brush too as the mascara really didn't get clumpy as I applied more layers. It's nice to know that it is formulated with lash-conditioning agents. Removal of the mascara wasn't too bad either. I think that it's probably on par with removing non-Asian waterproof mascaras. Oveall, it's a really nice mascara that works well with my stubborn, poker-straight lashes. I'm not sure if I would purchase it again--perhaps if I can purchase it myself in Japan (or have my son) because it is reasonably priced.

In case you're wondering what I'm using for my eye makeup, I decided to add it into this post. When I did the swap with Vicky for the Sleek Bad Girl palette, she surprised me and included L'Oreal Color Infallible eyeshadow in Time Resist White. I was so happy because I understand that this eyeshadow line will not be released in the U.S. To showcase the Agebuto mascara, I wanted to go with a more muted EOTD, plus I wanted to try out the Infallible.

Products used:

Mezaik Double Eyelid Stretch Fiber
Urban Decay Eyeshadow Primer Potion in Eden
NYX Champagne & Caviar Eyeshadow Palette
L'Oreal Color Infallible in Time Resist White
Wet N Wild Eyeshadow Palette in We're Blasting Off
K-Palette Real Lasting Eyeliner
Canmake Agebuto Mascara


I used Time Resist White on eyelid from lashline to crease and built colors from NYX palette onto it from mid lid to outer lid. I used the eyelid color from the Wet N Wild palette along my lower lashline.

The Infallibles are a wonderful eyeshadow line. I'm sure that most of you have read reviews on it so I won't go into detail. However, if you haven't read up on it yet or are interested in learning even more, I'd like to introduce you to my lovely blogger friend who created a beautiful bold, seductive eye look tutorial using several different Infallible colors. Sheila of Maddy Loves created this look and made this tutorial, which is her first tutorial video. I personally think that she did an awesome job. Please help her out by voting for her video. She can win a 2-day trip to LG Fashion Week in Toronto with backstage access to one of the shows where she'll be able to see L'Oreal Makeup Artists in action. You can vote for her here by just commenting that you're voting for Sheila. Voting ends this Friday, September 23, 2011.

Thank you!

*Kat*

Thursday, September 15, 2011

Swap Package/Prize and EOTD

Recently, Brianna of The Sun Girl Says returned home to California after living in Japan for 5 years. I was really excited to learn that she lives within walking distance to a Trader Joes. I asked her if she could pick something up for me and mail it and that I'd reimburse her. We ended up deciding to do a trade. Wondering what it is that I need to have from Trader Joes? Unsalted, toasted, slivered almonds!


I love these! I will eat it out of the package as a snack but it tastes really good on top of a vegetable salad. The funny thing is that the day before I received these in the mail, the husband asked if we had any more of "those nuts".

Also included in the package that she sent was a prize from winning her guessing game. She hadn't even announced it on her blog at the time that I received the package so it was a BIG surprise! I've never won anything from a blog contest/giveaway before.


Thank you Brianna! (I'm not sure if there were any more things in the bag as it got mixed up with some other things--please comment if there was more.)

On Saturday the 10th, I had a wedding reception to attend and was wearing a tunic top that is a pale dusty rose color with really dark chocolate brown spots on it. I wore it with black leggings. In trying to decide how I was going to do my makeup, I decided that the colors from the Wet N Wild eye palette prize would be perfect. The palette that I used is "We're Blasting Off".


Products used:

Mezaik Double Eyelid Stretch Fiber
Urban Decay Shadow Primer Potion in Sin
Wet N Wild "We're Blasting Off" Eyeshadow Palette
MAC Print Eyeshadow
K-Palette Real Lasting Eyeliner
Koji Eyelash Curler
Shiseido The Makeup Mascara Base
Covergirl Lash Blast Waterproof Mascara

Each shadow in the Wet N Wild palette is imprinted with where the color is to be used. As it turns out, it is where I would use them too, although I can see myself interchanging the pink and taupe colors depending on my mood.

I applied the pink color on browbone and over entire eyelid from creaseline on up. The taupe color was applied on the eyelid and along lower lash line. The chocolate brown color on outer eyelid and blended in towards the center of the eyelid. I also blended it upward towards the crease. MAC Print was applied on outer "V" of upper eyelid, along upper lash line and on outer 1/8th of lower lash line. Lined upper lash line and outer 1/8th of outer lower lash line with K-Palette Real Lasting Eyeliner. Using Koji eyelash curler, I curled my lashes and applied Shiseido mascara base. I use this when I want to make sure that my curled lashes will not uncurl. It really helps although I think that it's basically a clear waterproof mascara. I then applied Covergirl Lash Blast Waterproof mascara. This was a gift from K a while back but I only opened it up now. Thank you K!


I normally don't wear waterproof mascara any more after years of wearing it because it's a pain to remove easily. I know that it was partially from having to remove waterproof mascara, but also in part due to age that my lashes have become less full. I now stick to film type mascara that will wash off easily in warm water but doesn't smudge on me. The downside is that my curl doesn't stay like it does with waterproof mascara. For the occasions when I want prominent eyelashes, I'll wear waterproof.

I really like this Wet N Wild palette. The colors suit me well and are very wearable whether for a day look or night look. The shadows are amazingly soft and pigmented, normally associated with much higher priced shadows. Thank you again Brianna!

*Kat*

Friday, September 9, 2011

Purchase Review: Sue Devitt Base Makeup, Long and Picture Heavy

Today I wanted to feature from Sue Devitt, the gel foundation and pressed powder. This will complete the base makeup look for me. The concealer review, which was my first purchase from Sue Devitt, is here.

There are two different foundation formulations, gel foundation and whipped foundation. After playing around with the samples for a few days, I honestly didn't feel that there was too much of a difference between the two. Both foundations are formulated 3 different types of seaweed which are good for the delicate skin tissue. It also has a 70% water content. I was debating between two colors, Great Sandy Desert and Granite Downs. Granite Downs is is described as a medium beige good for tan/medium complexions while Great Sandy Desert is described as golden for olive/medium complexions.

I decided on Great Sandy Desert in the gel foundation because I found that as I swatched it on a white tissue, it showed up as a more peachy/pink than golden colored. Peachy/pink appealed to me because I felt that it would also help to cover up more spots with the peach tone in it. I also found that as the day wore on, Granite Downs got a bit too dark for my personal preference.


Another reason why I chose the gel foundation is because it comes in a bottle with a pump dispenser. The whipped foundation is in a jar.


Description and ingredients of the gel foundation:


The gel foundation is easily dispensed via the pump and you can control how much you want to pump out at a time. It is a thick gel and isn't runny at all, except for when I first used it. The first several pumps were very watery but it was just because it had settled and separated from the time of filling the jar till use. It's not surprising since the foundation is 70% water. There is 1 fl. oz/.30 ml of product, which is similar to Bobbi Brown. The cost is $38.00.


I couldn't get it to take an accurate picture of the true color of the foundation. In these pictures, it does indeed look like a golden color but it is a peachy/pink color. Applied on my skin, it sways more pink than yellow and that is perfect for me. The color is also an almost exact match on me.

Face with prepped and spots concealed with Bermuda Triangle Undereye Corrector:


Great Sandy Desert applied to half of face:


Great Sandy Desert applied to whole face:


If left alone, it does oxidize and I got a bit pinker than I preferred. As most of you are well aware of, I do not like using powder to set my foundation as much as possible because I find that it usually makes my face look matte and settles into fine lines. I recently started using Cle de Peau translucent loose powder and Guerlain Meteorite Pearls as I found that both worked well and didn't settle into fine lines. I like the glowiness that I get from Meteorite Pearls but it really doesn't help to set foundation very well.

When I talked to the SA at Macy's she suggested that I use the corresponding pressed powder. Although it's the same color, Great Sandy Desert, it is more neutral to yellow so it will help to tone down the pink of the foundation.


I was apprehensive of using a pressed powder but after reading that it has the same ingredient as Bermuda Triangle, flexible Nylon-12 which locks in moisture and contracts and expands with your facial motion, I decided to give it a go.

Great Sandy Desert Pressed Powder applied over foundation with a powder brush:


I found that the pressed powder did help to set the foundation and keep it in place for a decent amount of time. I also felt that it didn't make me look very matte. I will highlight under my eyes and high cheekbone area with Meteorite Pearls. 

Face fully done with pressed powder and blush:


Face after 10 hours of wear with absolutely no touching up:


I would normally prefer to do a quick touch up under my eyes and on my nose but didn't do so for blogging purposes. I think that I still oxidized a bit but it is actually very similar to my natural skin tone. The really nice aspect to this pressed powder is that it is really compact! It's just barely thinner than my iPhone!


There is .35 oz/10 g of product and costs $28.00. Maquillage Powder foundation refill has 12 g of product. Sue Devitt Triple C-Weed pressed powder does have less product but I can honestly say that I don't know when was the last time that I actually finished a pressed powder. I also really llike how thin and compact this is so it's easy to carry around and to travel with. I'm not sure if the "sponge" that is in there is actually a sponge applicator or if it's just a sponge sheet that is protecting the mirror--it is that thin! If it is supposed to be a sponge applicator, then that is the only real downside to this product.

I'm so glad that I held off on purchase the Chanel foundation that I was thinking of. After days of testing out the sample that I got, I felt that the foundation felt too heavy on my face. It felt like I was wearing foundation, which I don't like. As a result, I kept on touching my face throughout the day because it felt somewhat uncomfortable. With the Triple Seaweed Gel Foundation, I do not feel it's heavy on my face. Although it's a thick gel, it is vey lightweight and feels soothing and cool right after application.

I'm sorry that this was such a long post. It really should have been broken up into two different posts but I felt that with the two products working in conjunction with each other, it needed to be in one post.  I'm liking this brand so much that I may have to venture into trying out the point (color) makeup.

*Kat*

Wednesday, September 7, 2011

Purchase Review: Sue Devitt Bermuda Triangle Undereye Corrector

Sue Devitt is a beauty line that has recently been introduced into the islands via Macy's. It is a line that I had never heard of before and since it's mainly within the U.S., I don't think that it's very well known. I had been looking at this line every time I passed by the display. It intrigued me because of the concept of this whole line is inspired by exotic destinations and is infused with derivatives from nature, mainly marine and floral. It is supposed to be hydrating and anti-aging. All of these are components that are important to me.

I finally decided to take a test run and ended up purchasing the Bermuda Triangle Undereye Corrector with Orchid Extract. It is an undereye moisturizer and concealer.  It is a stick concealer in a twist type of container. It contains . 08 oz/2.5 g of product, which is comparable to other brands of stick concealers.


The ingredient list:

Click to enlarge so that you can read it

A swatch on white paper:


According to their website information on this product,  Orchid extract helps to keep the delicate undereye area hydrated, reduces fine lines and wrinkles and fights free radicals. It is peach hued to contrast with the blue-green tones that are common in undereye dark circles. It corrects, conceals and hides imperfections and creates a flawless complexion. There is also a special ingredient called Nylon-12 that expands and contracts in relation to your facial movements. This ensures flexibility in the formulation so it won't crack or crease. It has durability and long-lasting coverage.

As most of you know,  I have a rather large, dark spot on my cheek and it is difficult to find a concealer which will cover it up well. I've also mentioned before how one MUA told me that orange/peach tones work best in concealing dark spots. Since Bermuda Triangle is a peach-hued concealer, I put it to the test.

My naked face that has been prepped and primed:


After initial application of Bermuda Triangle, applied to undereye area and various dark spots on face:

I dabbed a little more Bermuda Triangle to the large dark spot and set it with my favorite setting powder:


Final look after applying Sue Devitt foundation (which will be in a later review):


I'm amazed by how well this concealer worked! You can't see that large dark spot at all.

This is after more than 10 hours of wear. I did touch up with powder on my nose and under my eyes, just a little bit. This is normal for me each day:


As you can see, the concealer is holding up very well on my cheek where the large dark spot is. I didn't do any touching up there.

I'm really happy with the result of this concealer. As promised, it didn't cake or settle into fine lines. It did seem that my undereye area stayed hydrated. I believe that I will repurchase this again.

There is only one color for Bermuda Triangle Undereye Concealer. Since it is peach hued, it is considered a universally flattering color. While there are places scattered within the United States where you can purchase this line, it doesn't seem to be widely available. You can purchase it online but unfortunately, they do not do international orders. You can find it in the UK at Harvey Nichols Knightsbridge. For more information, you can visit Sue Devitt online here.

*Kat*

Monday, September 5, 2011

Playing With Geo Mimi Circle Lens

As a beauty blog reader, I had been reading many posts from people who use circle lenses. I was always curious about it and stupidly thought that it was available only to people who needed to wear contacts for corrective vision purposes. It wasn't until recently that I learned that they are available as a non-presciption and non-corrective lens. This piqued my interest in them even more. I actually have sensitive eyes and don't like it when anything goes into them so I've always thought that if I ever needed to wear glasses, I probably would never use contacts since I can't see how I would be able to stand something on my eye. (I only recently started needing to wear glasses but only for reading.)

Recently Blair had tweeted that she was selling a pair of Geo Mimi Lens. I believe that it was in a gray color. I have to admit that curiosity got the better of me and I rationalized it was something that I should try as a beauty blogger. I went ahed and tweeted her back that I wanted to purchase it. Please check out her blog as she does quite a few posts on different contact lens and it looks so pretty on her.


I've actually had it for a while now but I needed to research on how to open the bottles, care for the lens and how to insert and take them out. I also finally got together with Mai, who wears contacts, so I had her help with showing me how to insert them and take them out. Unfortunately, she only uses hard contacts so it's a little different.

Here is my eye before I inserted the contact:


And this is the end result:


Can you see a difference? No? Don't worry if you don't because there actually is no difference! The 2nd picture was taken 12 hours after the first picture and after I had tried and tried and tried to insert the contact, but to no avail. Mai and I were laughing at first because it was quite hilarious. I've come to the conclusion that I can't spread my eyelids far apart enough to insert the lens. The lens is actually quite large and every time I try to insert it, my eyelids are not spread far apart enough that the lens actually inverts and molds itself to my finger. I finally did manage to insert it into my other eye--I guess that the lids are looser and can spread apart farther. Unfortunately, I could feel the lens in my eye and my vision was a bit cloudy. I'm not sure if it's because it wasn't centered properly or if that's how it is. I also thought that it looked a bit scary as my eye didn't look pretty and doll-like as I've seen with other wearers of these type of lens. My eye looked like a reptile's eye!

My conclusion on this is that I'm so glad that I tried it. I know that it's not for me. My eyelids can't spread far apart enough to insert it in. Besides, with me being older, I'm afraid that if I continue to spread my eyelids that far apart, it will lose whatever elasticity there is and will droop something awful. I'll stick with my own beady little eyes.

*Kat*

Saturday, September 3, 2011

Sleek Bad Girl Palette EOTD x 2

I'm sorry that I haven't been actively participating by commenting on blogs or responding quickly to comments. I caught a cold last week and still can't seem to shake it off. Hopefully I'll be back to normal soon.

I wanted to feature Sleek divine Bad Girl palette today. I know that this was released awhile ago and there have been many reviews. It is a limited edition palette and I was so lucky to have been able to receive this as a gift from the beautiful and wonderful Vicky of Vanity-Fashionista. We had been chatting on Twitter and I mentioned how I would love to try a Sleek palette and that Bad Girl really appealed to me. The package arrived on Thursday and I was so happy.


There was a bit of a mishap that happened during transportation to me where 3 of the pans in the palette got damaged.


It's all good though because it was still intact and very usable.

Products used for both EOTD:

Mezaik Double Eyelid Stretch Fiber
Urban Decay Primer Potion in Eden
Sleek divine Bad Girl Palette
K-Palette Real Lasting Eyeliner

EOTD 1:

I used the beige-ish color (2nd color on top row) over entire eyelid, from lash line to brow bone. The 2nd blue color (4th color on bottom row) from lash line to crease line. The white color (1st color, top row) was applied over the blue to tone the color down. Gun Metal (4th color top row) was used from mid eye to outer eye, blending upward into crease. The black/charcoal color (last color, top row) applied to outer 1/4 of eyelid. lined the upper lash line and also in outer "V" of upper eyelid. It is also used on lower lash line, the outer 1/8. Entire upper lash line and 1/8 of lower lash line is lined with K-Palette eyeliner.


I had read many reviews on how soft the shadows are and that they are pigmented. I was totally unprepared for how pigmented they are. When I applied the blue color, I barely tapped my brush onto the color and when I applied it, it was just a burst of color! Definitely way too dark, which is why I tried to tone it down with the white color. I'm thinking that perhaps a less dense brush will work better. The shadows are definitely soft, perhaps too much in that color is picked up very easily and the potential for fall outs is very high.

It was also to my dismay that the 3 colors that were damaged, ended up being way more damaged than first thought, perhaps because the shadows are so nice and soft. When I used 2 of the 3 colors, they disintegrated and crumbled into a powdery mess. I decided it was not a problem because I could repress it. I proceeded to put the white shadow into a little cup and some of the gun metal got into it. I cleaned it up as best as I could but it was quite minimal so I don't think it will affect it much. When I was getting ready to put the gun metal color into a cup, I jostled the palette accidently and the other dark silver color next to it (it was the other one that was damaged) crumbled while some of the gun metal fell out of the palette and most of the rest of it ended up in the other pan with the dark silver color. While I was cursing my clumsiness, I decided to just put both of the colors into the cup and mixed it together. Following the procedure for pressing pigments, I proceeded to work on the white color and the mixed gun metal/dark silver color. I filled the original white color pan with the white mixture and filled both of the other two pans with my new duo color mixture.


The new mixture is a nice medium silver color now. I am happy that I was able to salvage it with the bonus of having had to make my own custom color.

EOTD 2:

For this EOTD, I again used the beige-ish color over the entire eyelid. My new custom color was applied from inner corner to mid eye from lash line to crease line. The deep hunter green color (1st color, bottom row) was dabbed in the middle of eyelid, from lash line to crease line and blended upward and outward. The back/charcoal color (last color, top row) was applied to outer 1/4 of eyelid and in outer "V". It was also used on the outer 1/8 of lower lash line. I lined my eyes with K-Palette Real Lasting Eyeliner--the entire upper lash line and outer 1/8 of lower lash line.


I managed to not pick up as much color for this EOTD so it's a much more muted look that EOTD 1. It is good for a day time look.

I hope that you enjoyed my unexpected adventures in playing with this new Sleek palette, my very first one! I would definitely be interested in trying out some others. Thank you, Vicky, for this wonderful gift! You are truly a sweet person and I'm so glad to have become friends with you.

*Kat*