Wednesday, December 21, 2011

Blogger Secret Santa Gift

Monday night, the 19th, we were finally able to open out Secret Santa gifts. Thanks to Sheila who organized the Secret Santa exchange, she also organized a video chat on Google+ for us to open our gifts with each other. It was certainly a lot more fun doing it this way--a virtual Christmas party where we got to see each others expressions as we opened up our gifts. Unfortunately, my webcam wasn't syncing with Google+ for some reason and no one could see me. Actually, those of you in video chat were fortunate--haha!

The people who participated in this year's exchange were:

Ashley - http://makeupkismet.blogspot.com
D - http://shinyprettythings9.blogspot.com
Evie - http://asidewalkcafe.blogspot.com
Jamilla - http://www.makeupforprofessionalasianwomen.com
Jian - http://pinkfishtart.blogspot.com
Kat (me)  - http://maikatoshaberi.blogspot.com
Lulu - http://luluchinadoll.blogspot.com
Rosalia - http://style-love.blogspot.com
Sheila - http://maddyloves.wordpress.com
Vicky - http://vanity-fashionista.blogspot.com
Yinnie - http://looking-glass-beauty.blogspot.com
Vonnie - http://ohsovonnie.blogspot.com

This year my Secret Santa was Vonnie! She said that I was hard to shop for! Sorry Vonnie. I thought that I made it easy since I actually did a wish list this year. Last year, I didn't do any wish list and drove my Secret Santa nuts!

My gift actually was in two parts. The first package that arrived was actually the 2nd part and the 2nd package that arrived was the 1st part. I opened the first package and TA DAAA!


A package full of yummy Lindt Chocolate Truffles! I love those candies! Also enclosed was a Christmas card with a note revealing that she was my Secret Santa.

I then opened up the 2nd package and was surprised by one of the items on my wish list! Tarte's The Starlet Limited-Edition Makeup Vanity! I had actually considered buying it when it got released but then decided not to because it was something that I didn't need. When Secret Santa came up, I decided to put it onto my wish list. It is a 3-layer palette which has 4 different color-themes.

This picture is from the Sephora website as I couldn't get a good picture of the case.
It has a metallic type of finish and the flash just reflects off of it .


The 1st two layers/drawers are eyeshadows and the bottom drawer is Tarte's Amazonian Clay 12-hour blushes, bronzer and shimmering powder. Also in the 2nd drawer is a mascara and eyelash primer. You can click on the drawer pictures to bring up a bigger picture. Thank you so much Vonnie for this wonderful Secret Santa gift! I can't wait to try everything.

Thank you Sheila for organizing this exchange again this year. This year I was Secret Santa for Sheila, which was ironic because she was mine last year. It is through this exchange last year that I got to know Sheila much, much better and we are now good friends. For me, that is the most important aspect of joining an exchange like this. I've become better acquainted with bloggers and the friendships that I have formed are priceless.

*Kat*

Wednesday, December 14, 2011

Incoco, Take 3 NOTD

Ever since discovering Incoco Nail Polish Strips, I've been loving doing manicures. I know that I just posted my festive, Christmasy NOTD, which was okay but I felt was a little too busy and too much for my preference. I had to change out of it and decided to use what I think is one of the more popular designs as I can't find it in stock very often. This one is called Ballerina Princess.


I thought that it was pink when I first bought it but after looking at it better, there is a lavender hue to it. After applying it to my nails, it shows up much more and it's so pretty! There is a hint of fine micro glitter in it, which isn't visible in the picture but shows up really nicely especially in natural sunlight.


I thought Golden Lattice from my first post was my favorite but I believe that Ballerina Princess is my favorite. It is a beautiful pink-lavender shade with light gradation.

I did find that this set of nail polish strips seemed to be of a little different consistency from the other two that I used. It felt thinner, seemed more tacky and stretched more easily. Because it seemed to be more tacky, it adhered to the nails really quickly and firmly. Also because it stretched more easily, it was a little more difficult to use the other half of the strip on the other hand. I had some problem with it crinkling. It's good to make a mental note that if the strips seem to be of this type of consistency, it might be better to not try to use one strip on two nails.

*Kat*

Christmas Is In The Air

With the holidays fast approaching, it's beginning to feel more and more festive. Helping to add to that festive feeling is the blessings that I have received in the way of love packages and Christmas packages over the past couple of weeks. This is in addition to the Secret Santa packages that I received.

First of all was a love package from Yu Ming of Beauty-Box-Online. We follow each other on twitter and she remembered that I had once said that I was interested in trying out the MDB Earl Gray Tea & Macaron Masks and Chocolate Truffle Masks. She kindly offered to send me some since it hadn't worked out for her. Along with that, she included a few sample items. I can't wait to try all of the items out. Thank you so much Yu Ming!


Justine of Sakura Lovely and I also follow each other on twitter and we discovered that besides interest in makeup, we also share an interest in paper crafts and both fangirl cute, sexy and hot Johnny's entertainers. She sent me a lovely handmade card with an ornament that was designed and cutout using her new Cricut machine. It will definitely go on my tree when we finally put it up. I forgot to include them in the picture but she also sent me some lovely masks, one of which I can't wait to try--it's an eye mask. Thank you Justine for the beautiful card which was made with love.


I was really surprised today when I got a package from Mona of Make Me Blushhh. It was totally unexpected and she very quietly and sneakily sent it. All housed in a lovely zip pouch were some masks (we really can't have too many masks), nail polish, hand cream and a bag. I love bags and this one is a pretty pink and white print. The hand cream really intrigues me since it's a Vitamin + B12 hand cream. I can't wait to try this out. Thank you for the very lovely surprise Mona!


I also got two Christmas presents, which I opened up already because the two senders told me to open it. From Sheila of Maddy Loves, I got so many wonderful things! There's a bottle of Beauty So Clean that I had wanted to try. Each item included was neatly labeled with a note on it. I can't wait to try everything in there. One thing that I really wanted to highlight is that she made a beautiful necklace. On a sterling silver chain, there is a sterling silver shoe charm and a swarovski crystal bead in the color Clear AB. In the picture with all of the other items, it was taken with a flash so the crystal is showing up as blue so I also took a closeup picture of it with no flash so that you can see the beauty of clear crystal AB. It is my favorite color because it reflects different colors. Thank you so much Sheila for the heartfelt Christmas present. Thank you also for not keeping me in suspense and letting me open it early.


Lulu of Luluchinadoll is another blogger who I got to know very well through Twitter. She sent me a wonderful Christmas present as well. We are both Hello Kitty lovers and she sent me the cutest pair of Hello Kitty socks! I will wear this with my Hello Kitty PJs. I can't wait to try out the different makeup items that she included too. Thank you Lulu. I'm so glad that we've gotten to know each other through Twitter and blogging.


I also received another Christmas present from Tiffany of Rocketeer but I don't have any pictures yet because I haven't opened it yet. Thank you for thinking of me Tiffany. We discovered each other through blogging but found that we are bound together by something in common. Fate--life is interesting in that way, isn't it?

*Kat*

Monday, December 12, 2011

Blogger Secret Santa Exchange

A really quick post since I'm doing this at work...

Last year I joined in my very first Blogger Secret Santa Exchange that was hosted by Sheila of Maddy Loves and really enjoyed it. I was so happy when she announced that she was going to be hosting it again this year and I quickly signed up.

As per the "rules", we are to post a picture of our package after we receive it. I found out that there were two packages that were being sent separately and the 2nd package finally arrived.


As you can see, I have written on the packages in which order they are to be opened as I was instructed. I am not supposed to open these until Christmas Day. There is a possibility that we may do a video group chat to open our gifts together so whichever comes first is when I'm supposed to wait to open. I need to hide my packages so that I won't be tempted to open and find out who my Secret Santa is. Whoever you are, thank you and I can't wait!

*Kat*

Sunday, December 11, 2011

Purchase Review: Naked 2 and EOTD

When I first heard a few months back about there being a Naked 2 that was going to be released, I wasn't excited about it as the rest of the beauty blogging world was. I have Naked 1 and it's a really lovely neutral palette but a palette in which most of the colors are a bit too warm for my liking. I am also not much of a neutral colors kind of person. However, after seeing some of the early reviews by beauty bloggers that received the palette before the release date, I changed my mind. The reason being that it's a palette in which the colors lean toward being on the cool-toned side.

As soon as the released dated arrived, I went to Urban Decay's website hopeful but not getting my hopes up because one of the disadvantages to living in Hawaii is being in the latest time zone in the States. I was sure that it had already sold out by the time I went on at 8:00 a.m. Hawaii time but already 10:00 a.m. - 1:00 p.m. in the rest of the States. To my surprise, I was able to order a palette and received a notification 5 hours later that my order had been shipped!

8 days later, my order arrived and included was a gold eyeliner pencil.


I'm sure you've all read about the new packaging and the included mini lipgloss and brush so I won't go into much details about it.

You can click on this picture to view it at a larger size

While I normally don't use the included applicators, this double-ended brush is nice and of nice quality so this is one applicator that I will be using.


The nice features about the palette is that it comes in a tin and has snap closures on each side. This ensures that the palette is securely closed and much easier to travel with, if you choose to.


In Naked 1 my favorite color is Half-Baked and that color in included in Naked 2. In Naked 2, I have to say that probably my favorite color is Pistol. I tend to favor silvers, grays, silver/grayish taupes, charcoals and blacks and those colors are what I consider to be my neutral colors.

For my EOTD, these are the products I used:

Urban Decay Eyeshadow Primer Potion in Eden
Urban Decay Naked 2 Palette--Foxy, Verve, Pistol and Busted
K-Palette Real Lasting Eyeliner
Fairy Drops Mascara

My eyeshadow application is basically always using the same technique but using different colors. Primed my eyelid with Eden and lightly applied Foxy just under the eyebrow on the brow bone. Verve is in the inner 1/3 of eyelid and is blended upward just above the creaseline but not going into the contour/eye socket area. I also always like to blend it outward in that area above the creaseline so that the color fades out. Pistol is applied to the middle of the eyelid. Again, blending it upward and outward into the same area but at the outer 1/3 of the eye, I like to blend this color up onto the brow bone. I also blend well so that you can't tell where Verve ends and Pistol begins. Busted is applied to the outer 1/3 of the eye, blending upward to just above the crease line and fading out into the brow bone. Normally I like to smoke it out more and apply the same color or a charcoal or black to the outer "V" but I decided not to this time. Lined my upper lashline with K-Palette and the outer 1/3 of lower lashline.  I almost never completely line my lower lashline  because it tends to make my eye makeup look too harsh and can actually make my eyes appear smaller than they are. I lightly applied PIstol on top of K-Palette that has been applied to the lower lashline to soften it a bit. I have never mentioned this before but I usually do this with eyeshadow to soften the liner. I also try to fade the color inward toward the middle of the eye. I also applied Verve to the middle of lower lashline.


It is a good look for the day and for those who work in conservative offices. For the evening, you can "glam" it up by smoking the look. I came home and applied Blackout to the outer "V" area and blended it so there were no harsh lines.


This eye look is definitely more me. The first look is a little too soft for my preference and I actually was asked if I was feeling tired or coming down with a cold. I guess people who see me on a regular basis are used to me with a smoky eye look too.

Naked 2 is a nice addition to my growing eyeshadow collection. I can see myself using this palette much more than Naked 1.

*Kat*

Friday, December 9, 2011

Another Incoco NOTD

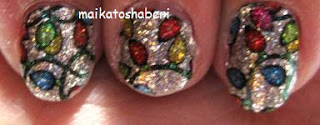
Since I mentioned in last night's post that I bought a Christmasy Incoco nail strip set, I thought that I would post about it today since I couldn't find it last night to take a picture of it. There were several different designs available, but I liked this one the best.


I applied the nail strips and about a half hour after I was done, I went to shower, washed my hair and dried and styled it. I then took this picture.


As you can see, it still looks freshly applied with no tip wear or chips. There's no way that I would have the same results if I used bottled nail polish. Sorry my middle nail is short because it tore off earlier today when I had no nail polish on. I now have festive nails, ready for the holiday season.

*Kat*

Wednesday, December 7, 2011

Purchase Review & Comparison: Incoco vs. Sally Hansen Nail Polish Strips

Again, sorry for the lack of posts and slow responses to comments. I've been sick for about a week now but in actuality have not been myself for several months. I finally went to the doctor yesterday and while I don't have a sinus infection, I do have sinus congestion so he told me take a different decongestant and prescribed a nose spray. In just 24 hours, I feel great! I don't feel like I'm in a fog anymore, don't have a dull headache and can actually breathe in air unconstricted. I didn't realize that I wasn't breathing in much air before. I'm actually feeling a lot like my old self and have energy again.

As promised a few posts back, I am here today to do a comparison between the Incoco brand nail polish strips and Sally Hansen nail polish strips. It was in this post that I showcased my NOTD using Incoco. This is my manicure after nearly two weeks of wearing it.


As you can see, my nails had grown and actually were getting too long that they were bugging me. It was time to cut my nails and remove this manicure. I'm always amazed by how long lasting these polishes are because I normally chip my nails within the first 24 hours.

This is what the Incoco nail strip packet looks like.


The cost of the pack is $13.00 but if you buy 3 or more, the cost goes down to about $10.00 each. (There are two sets of the strips in the pack.)  Also included, but not pictured, is a mini cuticle stick, an emery board, nail polish remover packet and some sample nail strips. The sample nail strips come two strips to a pack. These are great for if you are first starting out with this system because it gives you a chance to play with it and not use your pack to do the trial.

Sally Hansen nail strips is in a box and is like this:


What is not pictured is the 2nd packet of nail strips. The cost of it is an average of $10.00 per box. It also includes a cuticle stick and an emery board.

My nails after applying Sally Hansen nail strips.


For Sally Hansen, when I was peeling the nail strip off of the backing, it didn't peel off cleanly. Part of the side of the strip stayed stuck on the backing. For me, that is no problem because I have really tiny nails but for those with wider nails, it might be a problem if it sticks like that. I don't know if this means that there is more sticking power to it than Incoco, but I didn't experience this problem with Incoco.

A blogger friend commented that she can't apply the Sally Hansen nail strips because it looks bumpy on her. I didn't have this problem either although I did find that I couldn't reposition the strips after it stuck to my nail. Again, it could be that it just has more sticking power to it than Incoco, which in some ways is good. With Incoco, I am able to put it on lightly and slowly and carefully manipulate it into position.

I'm not sure if it's my imagination or not but I also think that Sally Hansen is thicker or has a more plastic-y feel to it than Incoco. The length of each strip is the same for Incoco and Sally Hansen. If your nails are relatively short like mine, I find that I can use one strip for both hands' nails. For example, I can apply the pinky-sized strip to my right hand, flip it around and apply it to my left hand. This way, each pack will last for two manicures instead of one. You can view Incoco's "how to apply" instructions here. While it does take some practice to apply it easily, for me it is so much better than spending time painting my nails and waiting for it to dry completely. I always end up smudging it or ruining it somehow. I also have problems waiting for each layer to dry properly so that's probably why it chips so easily.

My own personal opinion is that I prefer Incoco over Sally Hansen. Somehow, it just feels like it's a better quality nail strip. I think that Incoco's collection of designs and colors, are much more elegant than Sally Hansen's. Sally Hansen has glittery strips that are really glittery or design prints that are actually quite busy, like the one that I applied. Both wore well on me and lasted nearly two weeks before any chipping or peeling occurred. That is a miracle for me because I use my hands a lot and am really rough on my nails.

In Hawaii, there is an Incoco kiosk at Ala Moana Shopping Center, which is where I first discovered this nail polish concept. A kiosk just opened at the mall which is close to me, which is a good and bad thing. I just purchased a Christmas design, which will be my new manicure. Unfortunately, I don't know where I put it so I can't take a picture of it right now.

Have you tried either or both? What are your thoughts about it?

*Kat*

Sunday, November 27, 2011

NARS Hanamichi EOTD Take 2

In the previous post, I did a FOTD using the NARS Hanamichi palette. I wasn't quite pleased with how the eye makeup came out and I did mention a couple of ideas that I had on how to change it up a bit. I decided to try it out again today using my own suggestions and I am much more pleased with the way the look came out.

Products used:

Urban Decay Eyeshadow Primer Potion in Eden
NARS Hanamichi Palette
MAC Orb
Urban Decay Half Baked
K-Palette Real Lasting Eyeliner
Canmake Agebuto Mascara

I started the EOTD off the same way using the 3 colors from Hanamichi and MAC Orb. I then went over the gold color with Half Baked, which helped to lighten and brighten the inner eyelid area. I also used the gold color to soften the harsh lines of the black color and also added and blended it in the crease contour area and above on just the outer half of my eye. I lined my upper lash line and outer corner of the lower lash line with K-Palette. Using the black shadow I lightly went over the eyeliner on the lower lash line and then using the gold I applied it to the middle of eye of the lower lash line. I then went over the gold with the off-white highlighter color. I applied Agebuto mascara to my eyelashes that I curled.


The rest of my face was done the same way, with me using the red color as my blush. I also used the off-white color to highlight the upper cheekbones. NARS Mitzi was used on my lips again.

I think that by using Half Baked, which is a brighter gold color, it did help to make the inner eye area look--well, brighter. There was some pop to it, whereas using the gold from Hanamichi didn't seem to do much for me. I also let the red color show up more prominently, as well as the black. Overall it was a darker eye look from the previous post but I felt that it gave my eyes a little more definition, which I liked much better.

*Kat*

Saturday, November 26, 2011

Purchase Review, FOTD Featuring NARS

There are a couple of products that I'll be showcasing in today's review. I was able to get my hands on the LE Hanamichi palette a couple of weeks ago at a great deal thanks to Lulu of Luluchinadoll. She posted on twitter that we could get a really great deal of $80.00 worth of product from NARS for only $40.00. It was a great opportunity to purchase the Hanamichi palette that I had debated about getting but not wanting to pay the $65.00 price tag. I ended up getting a lipstick to fully use the $80.00 credit.


Unfortunately for us who live in Hawaii, there are some companies that will charge an additional shipping fee to ship it to Hawaii even though across the continental U.S. it is free.Quite understandable in that they are using FedEx to ground ship the products and there is no way that you can ground ship to Hawaii. One of the downfalls to living in Paradise.There are even some companies who will ship via USPS who will charge Hawaii residents higher fees. That I cannot tolerate and will not purchase from those companies at all. Seriously, shipping via USPS costs the same if they were shipping something to Hawaii as it does to ship to their next door neighbor. Fortunately, the shipping fee was quite reasonable.

The lipstick that I picked up is in the color Mitzi, a sheer strawberry pink with shimmer.


I'm sure that most of you have seen the various pictures of the Hanamichi palette and packaging. It comes in a fabric pouch and has the wisteria-wrapped kabuki eye brush in the middle. I have to admit that I haven't opened up the brush and looked at it. I normally don't use the included applicators but I will probably try this one out later.


The palette itself was pretty in the pictures that I had seen online but is absolutely gorgeous seen in person. I got to see it in person when I went to Neiman Marcus a few weeks ago.


After I saw it, it made me want it even more which is why I feel so lucky to have gotten this deal.

Normally I usually only do EOTD but this time I'm doing a FOTD.

Products used:

Missha BB Boomer Primer
Lioele Dollish Veil Vita BB Cream
Sue Devitt Concealer
NARS Sheer Glow Foundation in Punjab
Canmake Shading Powder 01
Cle de Peau Translucent Loose Powder
NARS Hanamichi Palette
MAC Orb eyeshadow
K-Palette Real Lasting Eyeliner
Fairy Drops Mascara
Guerlain Meteorite Pearls--Perles D'or & Teint Rose 01
NARS Lipstick in Mitzi

I started off with the primers and then did my eyes. Using Hanamichi, the gold is applied on the inner corner of my eyes and blended upward and outward in the crease area. The red color is applied in the mid eyelid to the creaseline. The black color is applied to the outer corner of the eyelid and blended inward to soften any harsh lines. I also used Canmake Shading Powder in the outer corner of the eye, just above where the black eyeshadow was applied to soften the black shadow and contour the eye a bit. I applied Orb to the browbone area.


I felt the gold color was a bit dull so I used the off-white highlighter shadow to try to brighten the gold and also over the red to soften it a bit. I don't feel that the red color is an extremely harsh color, nor did it make my eyelids look like it was red and sore but I do like it when I can have all of the colors nicely blended. Unfortunately, the effect that I was going for didn't quite happen.

I then cleaned up any possible fallout of eyeshadow on my undereye area with a q-tip and applied the concealer. Then NARS Punjab foundation was applied. This was a sample that I had asked for when I went to Sephora. It was recommended to me by Jamilla of Makeup For Professional Women. Although I had mentioned that I really like Chanel Perfection Lumiere foundation, I had to try this foundation out. I'm glad that I did. It's a nice foundation although it's a bit yellow on me. One great thing though is that this yellow is a brightening yellow. Most yellows make me look dull and sallow but Punjab doesn't. As I've started to do recently, I use Canmake Shading Powder 01 on the outer edges of my face to contour and to darken it a bit to match my neckline better. Lightly applied Cle de Peau powder over entire face.

Now I go back to my eyes to finish up. I lined my upper lashline and outer corner of lower lashline with K-Palette. I went over K-Palette with the black shadow and applied the gold color to the mid lower lashline. I didn't curl my lashes but did apply Fairy Drops mascara.

For my cheeks, I had read somewhere--I think that it was twitter and Sheila mentioned it--that she had read a blog that mentioned how they used the red color in Hanamichi as a blush. I decided to be adventurous and do so too. Using a duo-fiber brush, I tried to lightly pickup the color and apply it to my cheeks. It's definitely a bolder cheek look for me to use, especially during the day time so I then picked up some of the off-white highlighter color to go over the red. It didn't quite tone it down as much as I liked so I used Guerlain Meteorite Pearls in Perles D'or over it. I then realized that my face was a bit too yellow for my preference so I used Gerlain Meteorite Pearls in Teint Rose 01 on my forehead to add a touch of pink/rosiness to tone down the yellow.

Next I applied NARS Mitzi on my lips. Since the description is that it's a sheer strawberry pink color with shimmer, I thought it would be a brighter shade of pink. Unfortunately, it's an almost perfect match to my lip color, which is not what I was really going for when I bought the lipstick. I don't like to use nude shades on my lips as it makes me look really washed out so this color is what I would call my nude color. It worked out well with this stronger eye and cheek color.


The Hanamichi palette is so gorgeous to look at. The only really pigmented color is the black, which is a matte black. The red is pigmented enough but not so highly pigmented that you can easily over do the color application. The disappointment for me was the gold color. It is a dull gold and it doesn't show up well on my eyelids. It kind of just blends in with my coloring. Using the off-white highlighting color didn't really help to brighten up the gold and red so I think that if you want to add more brighteness to these two colors, perhaps a nice brighter gold like Urban Decay's Half-Baked or a nice shimmery silver can be applied over the two colors as a wash of color to lightly brighten it up. I think that I'll try using Half-Baked the next time I use Hanamichi. Overall, I'm really glad that I have this palette in my collection. It's definitely more of a collectors item than practical but it will not be one that will sit completely unused. I will be using it from time to time.

The holiday season is upon us. I hope that everyone will be enjoying it, whether you celebrate Christmas or not.

*Kat*

Thursday, November 24, 2011

Purchase Review: Chanel Perfection Lumiere Foundation

Good morning and Happy Thanksgiving to all of you, especially those living the U.S. and anywhere else in the world who celebrate it. I would like to start off this post with a big THANK YOU! We've been so blessed to have started this blog and see it grow into what it is today. Mai and I only had the intnetion of starting this blog as another way of keeping in touch with each other, especially with the makeup and skincare items that I either get a sample from at the store or purchase. Although we see each other often enough, sometimes I want to tell her about something that I've tried right away but doing it in a text message or trying to catch each other on the phone is difficult with our schedules. We have (especially me) have met so many wonderful people through beauty blogging whom I am proud to call my friends. Thank you to each and every one of you who takes the time out to read our posts.

Now on to the review...

Along with mascaras, finding the perfection foundation is my nemesis. Shade match is always difficult and then finding the finish and coverage that I like--it's so frustrating! Along this journey, I've learned several things about adjusting and adapting to shade matching and knowing what I like. Also along this journey, I've tried many brands, both drugstore and high-end hoping to find the one that I liked. Of course, I was hoping that I'd find it in the drugstore or lower priced brands.

One of the major frustrations with shade matching is that SA's will look at me and automatically categorize me as being yellow toned and needing foundation with yellow coloring, all because I'm asian. I always get a skeptical look when I tell then that I need something way less yellow based and more pink based and that I'm more cool toned than warm toned. Scary, naked face picture coming up but here you can see that my skin tone is cool with pink tones in it.


I finally found a SA/MUA that agreed with me and in all places at Neiman Marcus. A couple of week prior to going to Neiman Marcus, I happened to be in Macy's getting a sample of a Clinique foundation and ended up at the Chanel counter for something else. The SA there gave me sample packettes of the new Perfection Lumiere foundation in a couple of shades. One of the shades was 42 Beige Rose and when I tried it, I thought that the color was a good match for me. When I went back, another SA there insisted that I needed the Beige line and not the Beige Rose line so I left. At Neiman Marcus, the SA that helped me is very good at color matching individuals and she agreed that I belong in the Beige Rose line. At the time I thought that 42 was a bit too light so she gave me a sample of 52. It was way too dark! I ended up purchasing 42 Beige Rose.

Chanel Perfection Lumiere Foundation is a long-wearing, flawless fluid makeup that also contains SPF 10. It is an everyday foundation suitable for all skin types. It is oil-free and noncosmedogenic and is available in a range of 20 shades. It dries to a matte finish. It contains 30 ml/1 fl oz of product.


Click on the above ingredient list picture to get a larger image for easier reading.

I had read some reviews online and was a bit worried since it was getting mixed reviews. Another thing that worried me was the fact that it is a matte finish because I prefer a more dewy finish. I also prefer not to have SPF in my foundations but that is getting to be harder and harder to find.

I love the fact that it comes in a pump dispenser. It is also really easy to control the pump so you can just as easily get a full pump or pump out just a dot of foundation. As I read on some of the reviews, it is a foundation that it not easily blendable if you are using a brush. I usually use a Sonia Kashuk flat top brush to stipple on my foundation but I have found that it doesn't evenly distribute on the brush. This brush is a little narrow and stiff. I discovered that ELF Powder brush, which is a flat top, works quite nicely. It is much wider and softer.


The foundation does dry to a matte finish but there is a slight luminosity or sheen to it but it doesn't make one look oily. I've had some that make me look too shimmery. While it does dry matte, I find that as long as I moisturize well, it won't settle into or bring out fine lines.

There is a slight scent to it, which is a kind of flowery or fruity scent, but it isn't unpleasant and it dissipates quite quickly.

Coverage is light to medium, depending on how much you use. I get decent coverage and don't use much foundation at all. That is good because the price of the foundation is on the higher side. I believe that it is the highest priced in Chanel's line.

The longevity of the wear of the foundation is great! I've worn this foundation for over 8 hours and didn't do any touching up. In this picture, I took it after 8 hours of wear with no touching up. It also doesn't oxidize very much at all.


Overall, I think that this foundation is a good match for me. I had tried another Chanel foundation a few months ago and debated whether or not to purchase it. I decided not to because I didn't like the feel of the foundation on me after wearing it for several hours. It was one of those that felt heavy and felt like you were wearing foundation. As a result, I kept on touching my face throughout the day as it would feel a bit uncomfortable. The only con for me is the price. It is a pricey foundation at $55.00.

As you could see in my before and after pictures, I have a lot of imperfections that need covering up and this foundation does a good job of it, along with my pre foundation and foundation application routine. Would you like to see a post on what that is? It would be long a rather picture heavy. Please let me know in the comments.

*Kat*

P.S. I thought that I wouldn't be doing a post again until after Thanksgiving but I was up at 4:00 this morning getting the turkey into the oven. I tried to go back to sleep but couldn't so I wrote this post instead.

Wednesday, November 23, 2011

Quick Sewing Project Result

Those of you on Twitter have seen this already. Recently my dear friend from Japan came to visit. She comes regularly at least twice a year and actually considers Hawaii her home. She is definitely more "Hawaiian" than I am. She LOVES the culture, is even in a hula halau (dance club) in Japan. She loves the music, food, surfs and history. While on the other hand, I do not. I love the Japanese culture and it's so funny how I'll ask her about something current and she has no clue. She comes to Hawaii to our house and watches the Japanese dramas here.  We consider her to be family and she even calls me "Onee-chan",  which means older sister in Japanese.

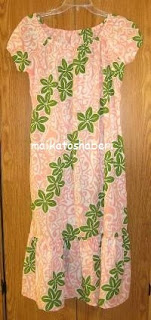
One tradition that she has is to travel to Hawaii and be here in the beginning of November because it's when her birthday is. Since my birthday is at the end of October, we usually have one night where we celebrate our birthdays together. This year I decided to make a very simple peasant style dress for her as her birthday gift. Knowing how much she loves Hawaii and the color pink, I combined those two loves by finding a Hawaiian print fabric in pink.


As I mentiioned, it is a very simple style and it took me perhaps 3 hours to complete it. Since it uses elastic in the neckline and sleeves, I had to customize it to her preference so I couldn't have the gift completed and wrapped up for her to open but she was happy nonetheless.

I do have beauty posts planned and lined up in my head. Hopefully I can write them up soon. There's been a lot going on here so it's been a little difficult to do--sorry!

In the meantime if I don't write up another post again before the big day, I want to wish all of you a Happy Thanksgiving! Mai and I are so thankful to all of you who take the time to read our blog. It has grown into something more than we imagined. I've also met so many wonderful, wonderful bloggers who I can sincerely say are my lovely friends.

*Kat*

Wednesday, November 16, 2011

Purchase Review & Comparison: Wet N Wild Mega Liner vs. K-Palette Real Lasting Eyeliner

Hi there! Long time no blog. Sorry for the lack of posts recently. Real life has had some hiccups along the way and it's also starting to get busy for me as the holiday season starts to come upon us. There are several reviews that I want to do and will do in the near future.

Today, I was going to do just a review of Wet N Wild Mega Liner but I decided to also do it as a comparison with my HG liner, K-Palette Real Lasting Eyeliner.


First of all, the one big difference is the price. Wet N Wild Mega Liner is only $3.99 here (will probably be cheaper on the continental U.S.) and K-Palette is around $15.99, depending on where you purchase it from. I bought the one pictured from iMomoko. It is a Limited Edition one because it is in the pink tubing. It normally comes in black tubing. The other difference is that there is a shaker mechanism in the tubing for K-Palette but none in Wet N Wild. I think that the shaker mechanism helps to keep the liquid fluid and flows better.

The saying that you get what you pay for holds true for this product. It was a disappointment for me in that the product does not come out evenly or nicely wet. It actually is a bit stiff and dry--kind of like a drying marker. It was also interesting that it didn't come out well because the tip of it is much thicker than the K-Palette.


If you work at it and layer it, then you'll get the kind of deep, dark lining that you would normally get with one swipe of K-Palette. I didn't want to work that much so after testing it out only that one time, I went over it with my K-Palette so I can't really review how well it lasts over a period of time.

I find that the Japanese-made pen liners work very well while the American made ones, I do not like. I had also tried Revlon's Color Stay liner and it didn't work well for me. While Physician's Formula may not be a Japanese brand, their pen liners are made in Japan and I find that it works out nicely too.

I'm going to add a bonus NOTD here. I normally do not do my nails on a regular basis because I can't seem to paint my nails and be patient enough for it to dry. I always end up smudging it. I also love how Konad works but can't seem to do it either. Thanks to Incoco, I am able to do manicures with nice designs. This is my current manicure and I really like this design and coloring.


I know that Sally Hansen has nail polish strips like Incoco and I've used it once but didn't really test it out well. I'll do a review and comparison in the near future too.

*Kat*