Showing posts with label gokubuto. Show all posts

Sunday, August 14, 2011

Party FOTD

Have you ever done your makeup and then wished you remembered what you used so that you can recreate it? Unfortunately, this is probably one of those where I don't know if I'd be able to recreate.
Yesterday was the husband's birthday and I spent the day running around trying to figure out what I was going to get him for his present. My first choice is not available any more due to the disaster in Japan. Hopefully after everything is rebuilt, it'll become available once again. My makeup for the day was a bit on the brighter side with muted cheeks and lips.

We had a birthday party to attend in the evening (we attended a birthday party on husband's birthday and it wasn't his party--haha) and I was planning on doing a gold and black EOTD. Unfortunately, I ended up not having time to completely wash my face and redo my makeup so I had to improvise with what was already on. As a result, I do not know how many and what colors are on my eyes.

Products used:

Face: Dermablend Cover Cream
          Lioele Dollish Veil Vita BB Cream in Natural Green
          Hada Labo BB Moist Cream in Natural Ochre
          Guerlain Meteorite Perles in Teint Rose

Eyes: Mezaik Double Eyelid Stretch Fiber
          Urban Decay Eyeshadow Primer Potion in Eden
          Sephora, Urban Decay and MAC eyeshadows
          K-Palette Real Lasting Eyeliner
          Fairydrops and Gokubuto Mascara

Cheeks: Canmake Loose Cheek in 01
              NARS Laguna Bronzer
              YSL Touche Blush in 5
              Maquillage Face Creator

Lips: The Face Shop Color Shimmer Lipstick in RD302
         Noevir Natural Code Lipstick in PK22F

For my face, I only had to touch up a bit using Hada Labo BB Moist Cream and powdering over those areas with Guerlain Meteorite Perles as my face makeup stayed pretty much intact. I haven't mentioned using Lioele Dollish Veil Vita BB Cream before as I had recently received a sample of this from a wonderful person who reads this blog. I will be doing a review on it soon.

During the day, I know that I used Sephora and Urban Decay eyeshadow palettes but I was just playing around with colors so I don't know what I used. I had actually done a similar look using similar colors once before but a much more muted look. I wanted to try the brighter look because I was inspired by Jenn of From Head to Toe and her recently uploaded tutorial. If you haven't read her blog, please check it out. She has an awesome blog and great YouTube videos.

For the evening party look, I decided to smoke it out more and added darker colors on the outer "V" using MAC's Contrast and blended it in. I didn't need to do much at all thanks to UDPP. Even with the hot weather and running around all day, nothing creased or faded.


I also added mascara to my lashes as I didn't use it during the day. What I didn't do and should have was to curl my lashes. NOTE: Colors are darker and more intense on real life.

During the day I had Canmake Loose Cheek in 01 on my cheeks. For the evening, I wanted to glam it up a bit so I bronzed with NARS Laguna and dabbed on YSL Touche Blush in 5 on apples of cheeks and blended it outward toward hairline.


I softened it up a bit by highlighting using highlighter colors from Maquillage Face Creator.

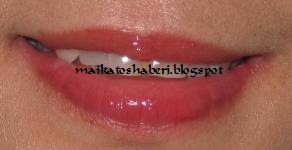
On lips I used The Face Shop Color Shimmer Lipstick in RD303, which is a beautiful deep red color. It's a bit too intense for my liking so I topped it with Noevir Natural Code Lipstick in PK22F, which I find a bit too light when used alone. Together, they work to form a beautiful color that I like.

Together they work to form a beautiful color.

The party was at a beautiful hotel in one of their lovely ballrooms. I'm glad that I decided to go with a more glamorous look for the party.

*Kat*

Thursday, June 9, 2011

Wedding Day Makeup

It was a very exhausting day but everything went very well. It was a beautiful ceremony and a small, intimate reception. We couldn't have asked for more, except for perhaps less wind at the ceremony. My son's in-laws are so down-to-earth and sweet and our new daughter-in-law looked gorgeous.

I thought that I had most of my makeup planned for yesterday but ended up changing it around quite a bit. I was originally going to use my Temptu for my base makeup but after using it in a trial run the day before, I decided to change and use the Hada Labo BB Moist Cream instead. I think that it gave a nicer, more dewy look whereas the Temptu ended up being quite matte.

So here's my makeup lineup:

Base Makeup


Dermablend Professional Cover Cream Concealer
MAC Motif Eyeshadow to set concealer
Hada Labo BB Moist Cream
Cle de Peau Translucent Loose Powder
Coffret D'or Powder Foundation (on nose)
Maquillage Powder Foundation (on spots)
Urban Decay Eyeshadow Primer Potion in Greed

Eye Makeup


Visee Blossom Eyes BR-5 (peach shadow in middle)
Visee Brilliance Forming Eyes A-1 (Pink shadow upper right corner)
Stila Artist's Inspiration Palette (golightly--taupe brown shadow lower left corner and ebony--upper middle)
K-Palette Real Lasting Liner
Koji Eyelash Curler
Shiseido Mascara Base
Fairydrops Scandal Queen Mascara and Gokubuto Mascara (on upper eyelashes)
Gokunobi Mascara (on lower lashes)


Cheeks and Lips


NARS Laguna
Lunasol Contrasting Cheeks N 11 Coral Pink
Chanel Rouge Coco Shine 57 Aventure


I wore a light pink outfit and it was a morning wedding with a lunch reception which is why I decided to go with a more neutral smokey eye. I really thought that I was going to use NARS Orgasm for my cheek color but I'm really liking my Lunsol blush right now. I had a selection of lip colors to choose from but in the end, decided on Aventure since I really like the color.

I will be spending the rest of the week and weekend taking the new in-laws around. At least we now can really relax and not worry about wedding plans.

Have a wonderful week everyone!

*Kat*

Sunday, January 23, 2011

Love Package, Barry M Products + EOTD

Last week I received a surprise love package from Nic Nic of bang bang she shoots. Nic Nic was so kind and generous to think of me when she was back home in the UK. She sent me  a very sweet note, two Barry M Dazzle Dusts and a Barry M lipgloss.


Barry M products isn't something that I can get in Hawaii, nor is it available in the U.S., I think.

The colors that she chose were two beautiful colors--a purple and a gold.


The lipgloss is a reddish-coral color.


I did two looks using these colors.

The first look products used:

UDDP in Greed
UD Virgin and Sin for highlights
Barry M Dazzle Dusts
K-Palette 24hr Eyeliner
Gokubuto Mascara


Here I have the Barry M lipgloss on. It's very pretty and isn't sticky at all. I actually forgot that I had lipgloss on and the color lasted quite a decent length of time.


I decided to use Benefit Bella Bamba for my cheeks.


For the second EOTD, I used the same products but added MAC Print to use on the outer "v" of upper eyelid to create a little more dramatic look.


Thank you Nic Nic for the very wonderful surprise. I was truly surprised. I love everything. The Barry M Dazzle Dusts are nicely pigmented and so easy to work with. The colors are gorgeous.

*Kat*

Monday, October 25, 2010

Another Book of Shadows III EOTD

Recently I got an email asking me a further opinion on the Book of Shadows III. It made me realize that I really hadn't done much with that palette other than that one EOTD that I did. That EOTD was what I would call a safe one as I basically used the standard colors that I always use. I decided to go out on a limb and use colors that I really don't use.


Products used:

UDPP in Sin
Urban Decay NAKED Palette
Urban Decay Book of Shadows III
K-Palette Real Lasting Eyeliner
Canmake Gokubuto and Gokunobi Mascara

I primed my eyelids using Sin. From the NAKED Palette, Sidecar was used on outer half of upper eyelid from creaseline up into brow bone area. Naked was used on inner half of upper eyelid from creaseline up into brow bone area. Buck was applied mid eye area to blend together the two other colors.


 Kush is used on inner 1/3 of eyelid from lashline to creaseline. Money is applied in mid 1/3 of eyelid from lashline to creaseline and blended upward and inward to blend all colors. Loaded is applied on outer 1/3 of eyelid from lashline to creaseline and blended upward and inward. I also used a clean MAC 224 brush to gently blend all of the colors together. Loaded is again applied to outer corners of upper eyelid in "V" shape and also lines the outer half of lower lashline. Kush is used to line inner half of lower lashline. Upper lashline and outer 1/3 of lower lashline is lined with K-Palette eyeliner. Applied gokubuto mascara to volumize and somewhat curl lashes. Gokunobi mascara is applied over that to lengthen lashes.

I liked being adventurous and using colors that I would normally not wear. It doesn't look that dark in the pictures but it was actually darker than it should have been for going to work.

*Kat*

Sunday, October 3, 2010

EOTD: Dior Extase Pinks

As soon as I had read this blog entry by Haru on Rouge Deluxe, I knew that I needed to try out this technique since I have the Extase Pinks palette. This palette happens to be one of my favorites from Dior since it is so versatile. I love the fact that it isn't just a one-color theme as it has light pink, pink, purple, silver and charcoal. While all of these colors work together,  I can also get different look using different colors from this palette and combining it with other palettes.

Products used:

UDPP Sin
Dior 804 Extase Pinks palette
Dior 186 Ultra Violet single eyeshadow
K-Palette Real Lasting Eyeliner
Canmake Gokubuto Mascara

I primed my eyelids with UDPP Sin. Following the technique in the Rouge Deluxe post, I used a blush brush to swirl all five colors from the Extase Pinks palette and applied it to my entire upper eyelid, from lashline to eyebrows. I then used the darker pink over entire moving eyelid. The purple color is applied from outer corner inward toward middle of moving eyelid, blending well with the pink. Ultra Violet is applied at the outer corner of upper eyelid in a "V" shape. I also used Ultra Violet on the lower lashline from outer corner to mid eye. With a soft brush I then applied the purple eyeshadow from Extase Pinks very lightly in the contour area of eye. Lined upper lashline and outer 1/3 of lower lashline with K-Palettle eyeliner. Gokubuto mascara on eyelashes.


After I finished my makeup, I found that my browbone was waaay too light and shimmery for my liking. I applied some bronzer onto my browbone to tone it down. Perhaps if I use Eden instead of Sin to prime it will not be quite so shimmery. I'll have to try this again.

Overall, this was a simple EOTD look. It is a little more muted that I normally wear but I think that I can layer on more eyeshadow to make it less muted. I found the technique of swirling the 5 colors together a unique approach to using and applying the eyeshadows. It does make for an interesting application. Perhaps it is similar to using the various swirled and mineralized eyeshadows. I do have another Dior 5 color palette but since it is a brown palette, I don't think that I'll attempt this technique with it. I may just end up with eyelids that look dirty.

*Kat*

Friday, October 1, 2010

Review + EOTD: MAC Disney Mineralize Eyeshadow "My Dark Magic*

Today's EOTD will be featuring the new and LE MAC Disney Mineralize Eyeshadow "My Dark Magic". To me, this is a two-toned purple palette with some bits of glittery, shimmery silver in it.

The mineralize palettes are different colors swirled around and this creates a few other tones of color. I've been into purples lately so this was right up my alley. I'm not sure if it's just the palette that I got but this one seems to be less glittery than the "She Who Dares" palette that I got. I actually really like the fact that it is less glittery. However, who knows what's hiding under each layer of the palette.

Products used:

UDPP in Eden
Visee Blooming Eyes PU-2 palette
MAC My Dark Magic mineralize eyeshadow
K-Palette Real Lasting eyeliner
Canmake Gokubuto and Gokunobi mascaras

I decided to use UDPP Eden instead of Sin because Eden is a matte primer, verses Sin which has shimmer to it. Using the lavender shade in the Visee palette, I applied it from lashline to under eyebrows, concentrating on the inner 1/3 of upper eyelid. Trying to use mainly the mid-purple color in the MAC mineralize eyeshadow, I applied that to the mid 1/3 of upper eyelid from lashline to contour area. Grabbing the deep, dark purple color (actually looks black) I applied it to the outer 1/3 of upper eyelid from lashline into contour area and gently blending it upwards to soften any harsh lines. I then tried to load some of the shimmery silver onto the brush and dot it in the middle of my eyelid under the fold line. Again using the lavender shade in Visee palette, I lined the inner half of lower lashline and line the outer half using the mid-purple color from MAC. The silver color from Visee was used to highlight the brow bone. Lined upper lashline and outer 1/3 of lower lashline with K-Palette liner. I applied first the Gokubuto mascara, which helps to curl and somewhat volumize (not by very much) my upper eyelashes. I then used Gokunobi mascara on upper lashes, which helps to lengthen it a bit more and on the lower lashes. I like the brush from the Gokunobi mascara since it's more like a comb and helps to separate my eyelashes. It's also much easier to apply it to the lower lashline. The Gokubuto mascara's brush is kind of an hourglass shape so it's difficult for me to use it to apply to my lower lashline.

Oops, please forgive the mascara smudge! I also just realized that I didn't use the same eye.

I know that you can't get the full effect of this EOTD without seeing my full face, but that's not going to happen--sorry. I was really pleased with how this EOTD turned out. It's actually nice for an evening look since it is a bit dark, giving a smokey eye effect. I think that I was a bit too glammed up to go to work with it but I did anyway.

Note to self: No more purple eyeshadows! I think that I have enough to last the rest of my life. This mineralize eyeshadow is also quite large so it will take a long, long time before I hit pan.

Have a great weekend everyone!

*Kat*

Thursday, September 30, 2010

Review: MAC Disney Mineralize Eyeshadow "She Who Dares" + EOTD

Originally, I wasn't interested in anything from this Disney collection. I didn't like the packaging and what I saw in print, didn't look too exciting. That all changed yesterday when I went to put on hold something for a blogger friend and I got to see the whole collection up close and personal. The two mineralize eyeshadows, She Who Dares (Green and Blue duo) and My Dark Magic ( Purple duo) just awed me with their beautiful colors. Up till now, I've stayed away from the mineralize products because of the heavy shimmer in it. The MAC MUA told me that these two were probably the best as far as pigmentation and least amount of fallout. I'm also a bit worried about the shimmers going into any fine lines and creating an awful look but I decided that I loved the color combos too much to pass it up.


First thing this morning I went and picked up the eyeshadows. I couldn't wait to get home so that I could play with it. I had a hard time deciding which one to play with and ended up deciding to go with the green/blue duo since I've been doing a lot of purple EOTD recently. Honestly, I don't like the design on the compact but oh well.

As far as my concern with fallout and pigmentation, the MUA gave me a few pointers. As I had learned in the Dior workshop, instead of swiping your eyeshadow from side to side or in a downward swipe, you should actually push your brush up. The MAC MUA said to use a flat brush, like the 239. In order to keep fallout to a minimum and to get good pigmentation, you then spritz it with Fix+ and dab the brush onto your lids. Do your eye makeup first and then the rest of your face to help take care of any fallout.

I found that using this method, the eyeshadows turned out really quite dark and it was difficult to blend, thus it kind of muddied my colors. I also stll got quite a bit of shimmers all over the place, which is something that I don't care for much.

I decided for my EOTD to mix is using mainly matte eyeshadows to try to tone down the shimmers in the mineralize eyeshadow.

Products used:

(All from MAC unless otherwise stated)
UDPP in Sin
Yogurt
Nylon
Remotely Grey
Neutral Pink
She Who Dares
Copperplate
K-Palette Real Lasting Eyeliner
Canmake Gokubuto Mascara

I primed with UDPP. Nylon on inner 1/3 of moving lid. (Moving lid is the area of your eyelid where your eyeball is.) The green eyeshadow from She Who Dares on middle 1/3 of moving lid and blue eyeshadow on outer 1/3 of moving lid. Copperplate in contour area (contour area is the indentation between your eyeball and browbone). I usually place my eyeshadow in the middle 3/4 of the the contour area--I don't go from end to end. Remotely Grey is then lightly layered over Copperplate and gently blended upwards into browbone area. Neutral Pink is applied in the inner contour area (where Copperplate and Remotely Grey wasn't applied) and gently swept upwards to the eyebrows. Blue is again applied in the outer corners for more depth and gently swept up and blended towards middle of the eyelid and upwards into contour area. (I'm one of those who has to blend well so that's also the reason why sometimes my colors kind of get muddy.) Yogurt is on browbone for highlight. Green is lightly swept on lower lashline from inner eye to mid eye. Blue is swept from mid eye to outer eye along the lower lashline. Lined upper lashline and 1/3 of outer lower lashline with K-Palette. Applied Canmake Gokubuto mascara.


As I said earlier, my colors kind of got muddied and I was disappointed that you really can't see the different colors. One MAC MUA had her eyeshadow on really dark. The other one you could see the beautiful blue color on her lids. I should have asked her how she achieved that but at that time I didn't realize that mine wouldn't turn out the nice blue. I will have to play with this more. You can also see the shimmers dotting my eyelashes and eyelids. Overall, though, I'm quite pleased with how my EOTD turned out. Seriously, this is literally an eye of the day because I did only this one eye. I left my other eye with this morning's makeup.

*Kat*

Saturday, September 25, 2010

Review: Missha Signature Real Complete BB Cream, Cle de Peau, EOTD

I didn't think that I'd be doing another BB cream review this soon since I believe that I have found a couple of BB creams that I really like. However, I was very curious about Missha BB creams having read some good things about them.

In one of my recent love packages, I received a sample combo pack of Missha M BB Boomer and M Signature Real Complete BB Cream.
The BB Boomer is a BB primer which is supposed to help the BB cream to adhere and give lasting power. It will also make your skin look brighter because it has pink pearl powder. It also is whitening and wrinkle repairing. The M Signature Real Complete BB Cream has SPF 25 PA++. There is a lot of information about what its characteristics are, which you can read about here. I believe that the same that I got was in shade 23, which is the darkest shade. I can't read Korean but that is the only number that was listed on the back of the sample pack that made any sense.

Here I have done my regular morning skin care routine, applied my Dior primer as well as the M BB Boomer. (I guess that I didn't need to apply the Dior primer.)

This is after applying the M Signature Real Complete BB Cream. I don't normally apply very much, only about a pea-sized amount. I am actually quite surprised by the great coverage that this BB cream provides. It's also a good shade for my skintone. (A MAC NC25-30)

Here I've applied Canmake concealer under my eyes and on the dark spot on my cheek. I've also finished my nose, under my nostrils, chin and from under cheekbones down to chin with powder foundation. I also dotted a little powder foundation over the dark spot on my cheek and right under my lower lashline.  Normally, I do this AFTER applying foundation on top of my BB cream. (I don't apply powder on my cheeks because I don't want it settling in and bringing out any fine lines.)

This is my finished face with blush. I am totally amazed that I had enough coverage with just this BB cream and didn't need to apply any foundation. I've never gone out with only BB cream before. The real test comes to see how well it holds up after 10 hours or more.

I had to do this "after 10 hours of wear" photo this way because the BB cream that was on my nose, under my eyes and upper part of my one cheek was removed, which will be explained later in this post.

It seems that this BB cream does hold up quite well even after more than 10 hours of wear. I'm not sure if the M BB Boomer was the reason this held up. I'll try it again using only my regular primer (I use either Dior or UDPP, depending on my mood but most often it's Dior) .

I really like this BB cream. It takes away one step of having to use foundation. I will have to think about it though because I have 3 BB creams that I am currently using, one which I just bought a backup. The other thing is the price of this BB Cream. It is $45.99 on the Missha US site. Does anyone know if it's purchased in Korea if it is a whole lot cheaper? My friends are probably going back to Korea for a quick trip next month. If it's a lot cheaper, then I could ask them to pick it up for me.

Continuing on...

The reason why part of my makeup was removed today is because I went to the Cle de Peau counter at Nordstrom. I had received a card in the mail that I could redeem for a 3 day sample of their Eye Contour Balm. At the same time, I could test out their award-winning concealer. It has been voted the Best Concealer for so many years in a row. It is makeup artists' favorite concealer. I was really excited to try this out since it's won so many awards and is loved by makeup artists.

The guy that helped me was really nice. He knew that I wanted to be able to cover the dark spot on my cheek. The concealer is a cream stick concealer in a tube. He told me that it is moisturizing so it's good for those who are concerned about hydration. The concealer feels really nice on, not heavy at all. He also applied very lightly some powder. He said that this powder is so fine that it will not settle in fine lines and is also actually hydrating. I must say that after wearing it for almost 6 hours, it does look really nice and I don't see any fine lines.

The biggest disappointment though was that it didn't cover my dark spot well at all. Even he was a bit surprised and got a little frazzled when it appeared that it wasn't going to do a good job on that stubborn spot. He even applied some cream foundation over it and while it looked better, it is still visible.


The first picture is using CanMake Cover & Stretch Concealer and the 2nd picture is with the Cle de Peau concealer. With the CanMake concealer, it is barely visible, while with the Cle de Peau it is much more visible. Actually, in the picture, it looks better than in person. I think that I'll stick with CanMake, which is priced around $11.00 or so. The Cle de Peau is $70.00.

To finish off this post, here's an EOTD that I did using my Dior 5-Colours Extase Pink palette, both Gokunobi and Gokubuto mascaras and K-Palette Real Lasting eyeliner. Blush was Lunasol but I can't remember which color and I can't get the refill to pop out. For my lips, I used MAC Lustre lipstick--Sweetie.


*Kat*

Thursday, September 2, 2010

Product Review: Canmake Gokubuto Mascara + EOTD--Pic Heavy

I'M IN LOVE!!! I believe that my search is finally over. I've searched long and hard for a mascara that will curl my stubborn eyelashes without using an eyelash curler. A mascara that is not waterproof and/or will wash off easily with warm water. I've spent a lot of money in this search and have been disappointed time and time again. Some have come close but most have failed...until now! I introduce to you...drumroll please....

TADAAAAA!!!
Canmake Gokubuto Mascara


To show you just how awesome this mascara is, I've taken pictures in different situations, which is why this post is rather picture heavy. I am also including an EOTD for K of cosmeddicted, which will be explained a little later.

I have the typical asian eyelashes, which are straight and do not hold a curl well. I can curl my eyelashes and use waterproof mascara and they'll stay curled. Removing it is a bit of a pain and can cause you to lose some of your eyelashes in the process. I've resorted to using Shiseido The Makeup Mascara Base, which is quite awesome. It helps to hold my curl and I can use non-waterproof mascara. I still have to use an eyelash curler to curl my lashes though and that in itself can also be harmful to your eyelashes.


For the first set of pictures, I decided to be fair and use a mascara that Mai finds to be pretty awesome for her. It is the L'Oreal Panoramic Curl. She says that it curls her eyelashes quite well but it does flake somewhat after it's been on for a while. I am not curling my eyelashes first, just applying it onto my normal, straight eyelashes.


Can you see any curl in my eyelashes? I don't. This mascara doesn't work for me at all.

Now for the Canmake Gokubuto Mascara...

Curled lashes--I see curled lashes! It's not just barely curled but nicely curled! This is so exciting for me! I can't stop staring at my eyelashes.

I went to work like this, with two different curling mascaras and only one side curled. My eye with the curled lashes even looks a little bigger.

Next day, I decide to try curling my eyelashes with the eyelash curler first.

This is curled using Koji #70 eyelash curler. You can see how curled my lashes are.

My eyelashes after applying Gokubuto mascara shows that it did lose some of the curl from the eyelash curler. It kind of looks like the way it did the day before. This is fine because the curl has a more natural look to it. Also, by the end of the day when I went to shower, I noticed that I lost more curl to my lashes however, this was like 16 hours after applying so what did I expect. It was definitely still curled.

Today I decided to curl my eyelashes with the eyelash curler, apply Shiseido Mascara Base and then apply Gokubuto mascara.

My eyelashes are super curled and I think that this look will be great for an evening out or special occasions.

There is no way around it, this mascara is awesome! I've been having such great luck with Canmake products lately. Canmake is an inexpensive Japanese brand. You can buy this from A Pop Of Kawaii and the cost of it right now is $10.90 plus shipping and handling. Of course if you are in Japan, the cost is a little less than this. Be sure to look for GokuButo mascara because there is also a Gokunobi mascara by Canmake. The Gokunobi mascara does not work as well as Gokubuto.

I want to end this post with an EOTD. I said that it was for K. This is because in one of my posts I had said that I haven't really worn brown eyeshadows until recently. She had asked me what colors do I normally use. So here they are...

Products used:

Smashbox Halo Hydrating Perfecting Bronzer
MAC Silver Ring
MAC Amber Lights
MAC Print
Canmake Loose Cheek 01
K-Palette Real Lasting Eyeliner
Gokubuto Mascara


I had been searching high and low (again) for a copper eyeshadow that is matte. It's difficult since copper is a metallic color. I had been using Amber Lights in my contour area but as I've gotten older, the shimmer in it isn't flattering in the contour area. I finally discovered that I had a matte copper color in my stash but it's in the form of my bronzer. Thus, Smashbox Halo bronzer is what I used in my contour area, from lashline to browbone. Silver Ring on inner 1/3 of upper eyelid, Amber Lights on middle 1/3 of upper eyelid and Print on outer 1/3 of upper eyelid and along outer 1/3 of lower lashline. Canmake Loose Cheek 01 is applied lightly onto brow bone. Lined upper lashline and corner of lower lashline with K-Palette and applied Gokubuto Mascara (this was 2nd trial day). On all 3 days, I did use the same eyeshadows.


Thank you for reading through this very long post but I am just so excited with this mascara.

*Kat*