Showing posts with label EOTD. Show all posts

Tuesday, November 17, 2015

Review: Sephora's VIB 500 Point Urban Decay Urban Vices Palette Set + EOTD

Hi Everyone!

I know it's been a very long while since I last blogged. There will probably be a future post on that but for now I'm very excited to blog about Urban Vices Palette set, which I received almost a week ago.

Last year there was a 500 point Urban Decay palette which I really like. One of the colors in that set has become a part of my regular rotation of colors that I use and fortunately, it is a regular stock item.

I happened to be surfing Sephora's website online and saw the Urban Vices set available for a 500 point VIB redemption. I immediately called my local store and found out it was also available in our store so I rushed out to get there.

The set comes in a big box with the Urban Vices design on it.


Inside the box is another box--a small box the size of the palette, again with the Urban Vices design on it.


The back of the box with some product information, including the shadow colors.


Inside the box is the actual palette. It is made of sturdy cardboard, which is something that I don't like but I can't complain since it was a bonus item using my points.


The colors are Dope, Hoodoo, Derailed and Smokeout. Also included is a mini 24/7 Glide-on Eye Pencil in Smokeout. I haven't had a chance to do some checking so I don't know if any of these are part of their regular line or not. I think that I have Smokeout in another palette but not positive. If anyone knows these colors availability, please comment and let me know.

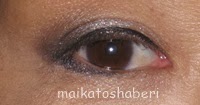
I did a quick EOTD using Hoodoo on the inner 1/3 of my eye, Derailed on the outer 2/3 of the eye. I dabbed MAC's Light Violet Crushed Pigment in the center of the eyelid just to give it some dimension and added Smokeout to the out corners of the eyelid and along the outer 1/4 of the lower lashline. I used Dolly Wink Eyeliner pen to line my eyes.


Like last year's palette, I'm really liking this one. One can reason that this gift isn't worth it because 500 points is equivalent to $500.00 spent. I like to look at it as a bonus, despite the value of the points because without the program, I wouldn't be getting anything. I think that with any reward program, one will never get full value of what their points were equivalent to.

I can't believe that it's mid November already. Somehow, this year has flown by much more quickly than any other year.

*Kat*

Sunday, June 15, 2014

Purchase Review: Wet 'N Wild Color Icon Floral Values Bouquet Floral Eyeshadow Palette, EOTD and Angfa Review Follow Up

A long while back, sometime at the beginning of this year, I chanced upon a new Wet 'N Wild Color Icon eyeshadow palette. This new line of palettes now come in a 5-pan palette and will be part of their regular line. I purchased the Floral Values Bouquet Floral palette.


Lilac, pink and purples are colors that I like and this palette is so pretty.

I finally pulled this palette out to use and here's my EOTD.

Products used:


Urban Decay Orginal Eyeshadow Primer Potion
Wet 'N Wild Color Icon Floral Values Bouquet Floral Eyeshadow Palette
K-Palette Real Lasting Eyeliner 24h WP
Sephora Crayon 12 hr Waterproof Jumbo Liner in 14 Violet

The medium purple color is applied to the eyelid, pink to middle of eyelid and dark purple to outer corners of eyelid. Lined upper eyelid with K-Palette eyeliner. Lined the lower outer corner of eyelid with Sephora Crayon Jumbo Liner and used a brush to blend it inward toward middle of eyelid. Lightly applied the dark purple eyeshadow over the jumbo liner.


It is disappointing but I found this palette difficult to work with. The eyeshadows were quite hard, not well pigmented and difficult to blend the colors easily. Wet 'N Wild eyeshadows have been a favorite drugstore eyeshadow line for me because it is nicely pigmented and of a softer consistency. Recently I had been reading more comments from other bloggers that the Wet 'N Wild eyeshadows that they have been using recently are on the hard side and not nicely pigmented. The only good side to this is that these eyeshadows are inexpensive so one doesn't feel badly about having purchased a product that isn't going to be used.

A couple of posts ago, I did a review on Angfa Scalp-D Beaute Pure Free Eyelash Conditioner/Serum here. Unfortunately, I hadn't taken any pictures immediately prior to starting using the product, which I started using about 2 1/2 weeks ago.  I went back through some of my older pictures and found one from September 2013. I decided to use it for the comparison picture with the picture that I took this morning. In neither picture, am I using any mascara.


The top picture is the one from 2013 and the lower one is from this morning. What do you think? Do you notice a difference? I think that while my lashes do not look longer, it does look thicker.

EDIT NOTE: I forgot to add that the recommended usage is twice a day, morning and night. I've been using it only once a day at night before going to bed. 

It's a new week. Have a good week everyone!

*Kat*

Friday, March 21, 2014

Sakura Inspired EOTD and Sweets

Spring is coming and soon it'll be sakura season in Japan. I love the beautiful, delicate flowers and the season is gone in a blink of an eye. I want to go back to Japan during sakura season again. Hopefully one day I will.

With sakura season coming, I decided to do another sakura-inspired EOTD.

Products used:

Urban Decay Eyeshadow Primer Potion
MAC Eyeshadow in Swish and Print
Urban Decay Eyeshadow in Smog and Uzi (From Book of Shadows III)
   later subbed Uzi with Giorgio Armani Eyes to Kill eyeshadow #23 Madreperla
K-Palette Real Lasting Eyeliner


When you see sakura trees, you'll normally see pink or white blossoms blooming on the tree branches. There are no green leaves on the trees. The bark colors range from light brown to very dark brown, almost black. With this in mind, that's how I came to choose the colors that I did.


After applying eyeshadow primer, I applied Swish from lash line to just above crease, from inner corner of eyelid to 3/4ths out. Smog is applied from just about the halfway point to outer corners of eyelid, putting more color in the outer 1/3 of eyelid. Using my fingertip, I applied a dab of Uzi to mid eyelid. I then lined the upper lash line and outer corner of lower lash line with K-Palette. Print is applied to the lower lash line over K-Palette eyeliner and gently fading it toward mid eye. I also applied Print to the outer "v" area of upper eyelid. I later realized that I didn't care for Uzi as much because of the glitter fall out that happened throughout the day. I did the same look again the next day and used Madreperla instead and liked it a lot better.

Since I was in a sakura mood with the EOTD, I headed down to one of the Japanese goods store that sells mainly various foods. One of the vendors in this store is a bakery and a friend had told me that they were selling limited edition sakura desserts. I had to get some as I love sakura-flavored sweets.


Top row: strawberry mocheese and sakura mousse. Bottom row: sakura blancmange and sakura mochi. Yes, there's a strawberry dessert in here but it looked so good that I had to get it too. The sakura mochi was from a different vendor in the store. All were delicious but the sakura blancmange is to die for! I HAVE to go back and get more before the season ends for this special dessert.

My friends in Asia often tweet and instagram pictures of the various delicious desserts and drinks that they have and I'm always especially wistful of the sakura ones. I'm so happy that there's a place here that we can get them this year.

Are there any special seasonal desserts that you enjoy? Please share it with me.

*Kat*


Wednesday, November 13, 2013

Purchase Review + EOTD--Make Up For Ever Midnight Glow Palette

Today I wanted to do a review of the Make Up For Ever Midnight Glow Palette. I was thinking of doing a different post (my Sephora haul--is anyone interested in it) but decided to post this one instead because I don't find too many reviews out there on this palette.


I saw this palette online and really wanted to see it in person but unfortunately, my local Sephora isn't carrying it. It looked really pretty online so I just had to get it, especially with the VIB sale that happened recently. It arrived yesterday and it is gorgeous in person!


The colors from left to right: Snow White, Gun Metal, Icy Blue, Icy Pink, 04 Black, Gold Pink, Midnight Purple and 127 Metallic Taupe. Unfortunately, the gorgeousness in the palette, doesn't translate the same when swatched. All of the shadows are quite hard and not highly pigmented. In fact, the first 4 colors are extremely light and need to be heavily applied to get good color. The last 4 colors are the darker colors in the palette and while they do show up with more color than the first 4, it does take applying several layers. The one color that I really like is 04 Black. Usually black eyeshadows apply extremely dark and harsh but because this shadow is hard and not highly pigmented, I liked the way this one applied. It gives me just the right intensity of color without appearing harsh. Overall for me, this palette is a disappointment. If I had been able to swatch it in store, I would not have purchased it. Perhaps it's just because I've been using more pigmented, buttery shadows that I am not too pleased with this. I feel that for the price, one should get a better quality product than this. It really feels like a drugstore brand eyeshadow.

Here's the EOTD look that I did with this palette:

I applied Urban Decay Eyeshadow Primer Potion first. Gun Metal was applied over entire lid from lash line to crease. Midnight Purple was applied to the outer 1/3 of eyelid and using my finger tip, I put one dab of Snow White to the center of eyelid and lightly blended everything. K-Palette eyeliner was applied and using Midnight Purple, I lined the lower lash line from outer corner and fading in towards mid eye. 04 Black was applied to outer "V" and I used Midnight Purple to soften Black and blend in the colors.


I think that the colors work well together and it created a nice EOTD but it did take a more heavy application of shadows than I normally do.

Don't forget that the quiz answers are due in two days. I have several people who answered on the blog and a couple who have privately emailed me. Join in the fun!

*Kat*

Wednesday, November 6, 2013

Purchase Review + EOTD SUQQU EX-07 Tsukiakari

A few months ago I had purchased some items from a blog sale and one of the items that I got was SUQQU EX-07 Tsukiakari eyeshadow palette.


I had heard many good things about SUQQU so I am excited that this is my first and only SUQQU palette. It appealed to me because it isn't strictly a brown eyeshadow palette but also has a peachy-pink and off white powder shadows and a navy cream shadow/liner. I don't tend to look well with warm tones and especially brown shadows but I have been really liking this palette a lot. The powder shadows are soft and buttery and nicely pigmented.

For my EOTD, these are the products that I used:

Urban Decay Eyeshadow Primer Potion
SUQQU EX-07 Tsukiarari
MAC Deep Secret from Mystic Cool Eyeshadow Palette
K-Palette Real Lasting Eyeliner


I applied the peachy-pink color over the entire lid from lash line to just above crease line. The brown shadow was applied from the outer end of the eyelid and blended in toward mid eye, concentrating the color mostly on the outer 1/4 of the eyelid. Using K-Palette, I lined the upper lash line of the eyelid and the outer corner of the lower lash line. The navy cream shadow was applied to the outer "v" and to the outer 1/3 of upper lash line. I don't normally like to use cream shadows since it doesn't work well with the Mezaik Double Eyelid Stretch Fiber but since I'm applying it to just the outer "v" and lash line, it has worked okay. Deep Secret is applied to the line the lower lash line going over the K-Palette and fading it in toward mid eye. Deep Secret is also applied over the Navy cream shadow to the outer "v". Using a fluff brush, I blend the edges of the "v" to soften the color a bit. I then lightly applied more of the brown shadow to blend the colors in even more.


With the blue, it brings in a cool tone color which helps to offset the warm tones and thus I think this is what helps make this eyeshadow palette work on me. You can create an evening look by not blending out the outer "v" so much and keeping it darker. For the last month or so, I have been reaching for this palette and Urban Decay Anarchy Face Palette almost every day.

*Kat*

Wednesday, October 30, 2013

Urban Decay Anarchy Face Case Review and EOTD

I know that I had done a quick review of this latest acquisition but I've had time to really work and play with it so I can now do a better review.

The Anarchy Face Case contains 5 eyeshadows, two blush, a highlighter, 24/7 eye pencil and a Super Saturated High Gloss lip color.


I don't use eye liner pencils so I can't really review it. The blush are nice colors which are wearable for me and while I don't normally use highlighters, I do on rare occasions. I love the Super Saturated High Gloss lip color and I have it in Lovechild. The one included with this set is Scandal, which is quite a bit darker than I normally wear.

Going from let to right on the eyeshadows, Redemption, a deep gunmetal satin; Fray, warm mauve matte; Vaporize, a deep metallic gray-taupe shimmer; Provocateur, a light metallic mauve shimmer and Revolt, a bright metallic silver shimmer. The last two colors also have micro glitters in them.

I have been reaching for this palette on a regular basis and it has quickly become a favorite. I use all of the colors except for Fray. All of the colors are buttery soft and nicely pigmented. The only "problem" shadow is Provocateur. This shadow crumbles easily so it's best to tap the color onto your makeup brush and not swipe it on.

This is the first look that I did with Anarchy:

Products used:

Urban Decay Eyeshadow Primer Potion
Redemption, Vaporize and Revolt eyeshadows
K-Palette Real Lasting Eyeliner Pen
Fetish blush, which is the mauve-pink blush
Scandal High Gloss lip color

Eyes done with Revolt on entire eyelid from lash line to just above the crease line. Vaporize is on outer eyelid blending it in toward mid eye. Redemption is blended in on the outer "v" and lining the lower lash line, fading in toward mid eye. Lined the upper lash line and outer edge of lower lash line with K-Palette.


Cheeks are lightly brushed with Fetish.


Lips are lightly colored with Scandal.


EOTD 2

Products used:

Urban Decay Eyeshadow Primer Potion
Redemption, Vaporize and Revolt eyeshadows
K-Palette Real Lasting Eyeliner

Using the same application method above, I used Revolt instead of Provacateur. This 3 shadows are my go to colors. It doesn't look much different in the pictures but this look comes out a little stronger in color than the first one.


I am really liking the eyeshadow colors. I am hoping they get released as singles. I also heard from my Sephora SA that Anarchy was going to be permanent, although the website still says it's limited edition. If it's going to be limited, I am going to have to pick another one up. I am liking it that much.

*Kat*

Monday, September 16, 2013

Addiction EOTD

I realized today that I haven't done an EOTD post in a while. I've been really boring the last few months using only the same eye shadows and blush. I recently purchased some new things from a blog sale, in which there were several Addiction eye shadows. I am so happy to have acquired them and the people doing the blog sale were fair in their pricing and so very helpful and quick. There are still quite a few items available so if you're interested in checking them out, please go here to sgbeauty sales. My main contact person has been Elaine, who I got to know through blogging, twitter and instagram. A super sweet and beautiful person.

On to my EOTD...

Products Used:

UDPP Original Eye Shadow Primer Potion in Original (not pictured)
Addiction Single Eye Shadows in Horizon and Blue Moon
K-Palette Real Lasting Eyeliner in Black


I first prime my eyelids using Urban Decay Primer Potion. It's the best eyelid primer for me. I was looking at the newly released Anti-Aging primer but the SA at Sephora told me that if I'm using a firming eye cream, then I'm getting more benefits from that than I would from the new primer potion and that I should just stick with the original, which I like so much. (Thank you SA for saving me $28.00.)

I then applied Horizon to the inner 2/3rds of my upper eyelids from lash line to just above crease. Blue Moon is applied to the outer 1/3rd of upper eyelids and blending it in towards the middle. Lined my upper eyelid and outer corner of lower lash line using K-Palette. Using Blue Moon, I go over the eyeliner on lower lash line and blend it in towards mid eye. I also applied Blue Moon to the outer "V" and blended it in.


It's a very simple eye look but I was pleased with the results. It's a softer look than I normally wear but I didn't feel like it was too soft on me. In fact, when I walked into the MAC store this afternoon, my regular SA there saw me and he said that he really liked my makeup today. That was definitely an ego booster!

The other Addiction eye shadow that I had purchased through this blog sale was Deep Forest. I had debated about it but I'm so glad that I did because I found out recently, after I purchased it, that it will be a discontinued color. I found this information out from Rouge Deluxe's blog post.

Have a great week everyone!

*Kat*

Sunday, March 31, 2013

Easter Egg EOTD

Happy Easter Everyone! I didn't think that I'd do another post but I got inspired when I thought about easter egg colors and wanted to do an EOTD along the same lines. When you think about Easter and coloring eggs, you usually think of the colors yellow, pink, purple, blue and green, or at least I do.

Products used:

Sephora Prisma Chrome Eyeshadow--Gold Reflection
MAC Pigment (which I pressed)--Violet
Urban Decay Eyeshadow--Radium
Urban Decay Eyeshadow--Kush
Addiction Eyeshadow--Mystic Mirage
K-Palette Real Lasting Eyeliner--Black
Covergirl Lashlast Clump Crusher Mascara--Black

I did my standard prepping of my eyelids and then applied Gold Reflection to the inner 1/3 of upper eyelid. Violet was then applied to the middle 1/3 of eyelid and Radium applied to the outer 1/3. Mystic Mirage was applied to the outer half of brow bone. Lined the upper lash line with K-Palette and outer corner of lower lash line. Radium was then applied to lower line to just about half way in. Although you can't see it well, Kush was applied to the lower lash line at mid eye and Gold Reflection was applied to inner 1/3 of lower lash line. A light application of mascara to the upper eyelashes.


To finish off the rest of the face, Canmake Cheek & Cheek blush in 06, which was a LE color, was used and Revlon Lip Butter in Berry Smoothie was applied to the lips.

It was a colorful eye look but all of the colors weren't over the top that it looked ridiculous.

*KatI

Thursday, March 28, 2013

Spring/Sakura Inspired FOTD w/Product Review

Spring is slowly coming around and brings with it all of those pretty pastel colors. I tend to gravitate towards spring eye makeup collections because of the pretty colors but have to keep reminding myself that I can't use them because they are too pale for me.

Sakura has come early this year in Japan and from last week Tokyo was already in full bloom. I love sakura and it was either last year or the year before that I did sakura inspired look. I have decided to do a new sakura inspired spring look.

When you thnk of sakura, one normally thinks of white, pink and brown colors. If you look carefully at a sakura tree in bloom, you will notice that there aren't any leaves. The leaves come out after the flowers fall off.

Products used (some are not shown):


Urban Decay Primer Potion--Original**
MAC Eyeshadows--Vanilla* and Samoa Silk**
Addiction Eyeshadow--Mystic Mirage (Gift from Justine)
Sephora Prisma Chrome Eyeshadow--Gold Reflection
Quo All About Eyes Eyeshadow Palette--Bronze (I think that's the color. Gift from Winnie)
Giorgio Armani Eyes to Kill Eyeshadow--23
Urban Decay Eyeshadow--Kush (from BOS III)
K-Palette Real Lasting Eyeliner--Deep Brown


Covergirl Lashlast Clump Crusher Mascara--Black
Canmake Shading Powder--01**
Chanel Sculpting Veil Powder--Notorious** (Gift from Vicky)
Lise Watier Blush--Pink Power (gift from Justine)
Urban Decay Super Saturated High Gloss Lip Color--Love Child

I also used Boujois 123 Perfect Foundation, Sue Devitt Bermuda Triangle Concealer, Make Up For Ever Full Cover Extreme Camouflage Cream in #8, NARS Orgasm blush and Sephora Eyeshadow in Sun Kissed, which has been discontinued--so sad! I use these all to finish my face and if you haven't yet, you can read my concealing method here.

This may seem like a lot of products but it really isn't. The items with a pink asterisk are items that I use on a daily basis. For the eyeshadows in palettes, I marked the ones that I used for this look with a red asterisk.

As is standard preparation for my eyes, I prime my eyelids with primer potion. I then use Samoa Silk in the socket of my eyelid and bring it out to on top of the outer half of the brow/socket bone. My bone is very prominent and it makes my eyes look sunken in, plus with age, it seems to have sunken in even more. Using the orange-toned color helps to lighten the darker area on the inner eye socket. (This is the same concept with concealing.) Because the brow/socket bone is so prominent, I like to use matte eyeshadow to very thinly highlight just under the eyebrows. I usually use Vanilla.


I then applied Mystic Mirage from inner corner of eyelid to just about 3/4 of the way towards the outer eyelid, and bringing it gently upwards towards where Samoa Silk is applied. The outer 1/4 of the eyelid is where Bronze is applied sweeping it inward to blend into Mystic Mirage. I also pull it upward into Samoa Silk and going on top of the outer brow bone. Gold Reflection is lightly applied where Bronze and Mystic Mirage meet to blend the two colors in. Sometimes you do see a hint of yellow in the center of a flower, depending on the variety. I'm not sure if this applies to sakura too. Although this look is sakura inspired, it is also a spring look so I wanted to incorporate a little bit of additional color. I then lightly applied GA ETK #23 very lightly over the entire eyeld. This softens everything a bit but the main reason why I used it is because it is an iridescent eyeshadow with very fine iridescent flecks. Sakura season is a very special time of the year and its beauty and glory are quite magical. I wanted to have the wash of iridescent specks to create that magical feel. K--Palette eyeliner is applied to entire upper lash line and flicked up at the end a bit. The outer half of the lower lash line is lined also. I then apply Bronze over the eyeliner of the lower lash line and deepen the outer "V"  with Bronze, softening the flicked up line. Kush is applied to the lower lash line at mid eye, just to give it a slight pop of color. Again, green isn't part of sakura but it is a color associated with spring and new growth of plant life. Clump Crusher mascara is applied to my lashes.


My cheeks are contoured using Canmake Shading Powder 01 and I also bring the color up to the temples and forehead. Notorious is applied in in darkened hollow of my cheek, close by the ear. I also very lightly apply it from my jaw bone down towards the chin. I think that I have a sharp jaw bone so this helps to soften it as well as give the illusion of narrowing my face. Pink Power had to be used in this FOTD because of the sakura theme that the design has. Thank you Justine for this beautiful blush and for Mystic Mirage!


Lips were colored using Love Child, which gives it just the right hint of color. I think it's a perfect spring color.

As most readers are aware, I am not a brown eyeshadow person. Browns tend to wash me out or make me look tired. I am also not a big fan of wearing neutral or pale looks. Again, it's because I look washed out. Warm tones are definitely not good on me, although I love how others can make warm tones and neutrals work for them. It took me a long while to use the Quo palette because it was a beige and brown color palette. Also, there is a very pretty embossed design on it and it was just too pretty to use. After looking at the palette more and more, I began to think that it looked more cool toned than warm toned, which is why I decided to give it a go. I was very surprised that I liked the way the two shadows looked on me. The shadows themselves are very nice, not overly pigmented but are nice and soft. They are not chalky at all. With Bronze, the darker color, you can't over do apply the color, which is nice. I even liked that it was a more muted look that worked on me. I still prefer to have the outer corners of my eyes darker but feel that I can comfortably use this for a day time look without looking washed out or like I'm not wearing any makeup. Thank you Winnie!

Chanel Notorious was something that looked so interesting to me when it came out. I was curious to try it but hesitated purchasing it. I joined the Blogger Secret Santa exchange again this year and put this out onto my wish list. Vicky was my Secret Santa and she sent it to me! I was excited to try it and yet was a bit hesitant to see how a gray-colored powder could work as a contouring powder. Normally we use browns so gray seemed to be a bit harsh. If applied correctly, it works great! You really need a light hand. When you think about it, the recessed parts of your face actually look more gray/black than brown--at least on me it is. Thank you Vicky!

Mascara is one thing that I have trouble finding that will work well for me. I have poker straight lashes that are difficult to keep curled, unless I use waterproof mascara. Clump Crusher is water resistant so it comes off easily with a gentle makeup remover and washing with warm water. The formulation is on the drier side, which works better for me. The amazing thing is that this mascara WILL curl my lashes without using an eyelash curler first. I used a light application here and it gave my eyelashes a natural curl look. If I apply more mascara and really press the wand into my lashes, it will curl it even more and giving me a more dramatic look, which I don't care for much anyway. The other great thing about this mascara, it doesn't flake! I can wear it for 12 hours or longer and not have it flake. Definitely my favorite mascara!

I decided to (12 hours later) darken the eye up a bit to make it more "evening out" appropriate. I decided to pull out Urban Decay Smoked Palette, which I have had for a while but not used.


I decided to use Barlust, which is a medium brown color. I applied it to the outer corners of the eye to deepen the color a bit and added it to the outer 1/4 of lower lashline.


I'm not sure if it's the right brown for me yet. I have to play with it more. I've read varying reviews on what people think the color is--Temptalia calls it a reddish brown while others have said it's a golden brown, neutral brown, etc. If it comes out more reddish brown on me, then it'll definitely not work. It was already late when I did this and only artificial lighting so I will have to test it out again during the day time.

This was a long post. Thanks for reading through it all!

*Kat*

P.S. Happy Easter!

P.P.S. There are still items available in the blog sale

Sunday, December 16, 2012

L'Oreal Lash Serum--7th Week and Holiday EOTD

I'm back with another L'Oreal Lash Serum progress report. I've been showing weekly progress pictures every other week or so with 2 to 3 weeks pictures. I must say that at this point, it doesn't seem as much more has happened or perhaps will even happen so I don't think that I'll post each week's picture unless you'd like to continue seeing it.

This is week 7, again with no makeup and with makeup.


Again, I must say that I've been very impressed by this serum and will continue to use it.

I had a couple of Christmas parties to attend in the same night and I wasn't sure if we would try to make both. I decided to do a green and gold holiday EOTD and finally wear some mascara with my newly grown lashes.

Products used:

Urban Decay Eyeshadow Primer Potion: Eden (not shown)
Urban Decay Eyeshadows: Blitz, Junkie (Vice Palette), Kush, Loaded (BOS III Palette)
K-Palette Real Lasting Eyeliner
NARS Pencil Eyeliner
Canmake Agebuto Mascara
Maybelline The Colassal Volume Express Mascara
Sephora Collection Glitter Eyeliner and Mascara: Gold


As usual, I primed my eyelids with primer potion.Blitz is applied to the inner 1/3 of eyelid, Kush to the middle 1/3 of eyelid and blended in sweeping back and forth motion into and just above the crease, sweeping out towards the end of the outer corner. I did not sweep it completely to the inner corner. Junkie is applied to the outer 1/3 of eyelid and blended into Kush. K-Palette is applied to upper lash line and outer corner of lower lash line. It's basically just dotted there to connect the uppler lash line lining to the lower lash line. Loaded is used to line the lower lash line, blending the dotted outer corner and fading the lining towards the middle of the eye. Loaded is also used to the outer "V" of upper eyelid to add a bit more depth. I curled my eyelashes--for the first time since I started using the lash serum--and applied a light coating of Agebuto mascara. It is a waterproof mascara and I need to use waterproof mascaras to hold the curl if I wanted it to be as I curled it. I then applied a couple of coatings of The Colossal Volume mascara to the upper lashes and lightly to the lower lashes. I usually don't like to apply mascara to my lower lashes because it makes me look like I have black eyes. Having been using the lash serum, it has really enhanced my lower lashes as well and applying mascara gave it an even more extreme look so to soften it I used a brush to angle it towards the outer corner. I then applied NARS pencil eyeliner to upper waterline.


As a last step to add a bit more glitz to my eyes, I applied gold glitter eyeliner to 1/4 of the lower inner lash line. Unfortunately you can't really see it in the picture. The product that I used for this is Sephora Collection Glitter Eyeliner and Mascara. The SA at Sephora was wearing it and it looked really nice. I was concerned about the glitters being that close to the eye and she said that she hadn't experienced any migrating of the glitter into the eye so I decided to pick it up in gold and in silver.


The tip of it is like a regular eyeliner brush and after that there is the mascara brush. It actually takes quite a few swipes to get the glitter onto your eyelashes but after I tried it, I decided that I like using it as just an eyeliner. Unfortunately, there was a LE mini set of this in just eyeliners and that probably would have been a better purchase for me since I ended up deciding that I will not use it on my lashes.

Swatch so that you can see what it looks like:


I like the way it gives a litte bit of sparkle to your eye. I had a lot of women friends who loved it. It was only the hubs who, at the end of the night, asked if that's glitter or tears!

I initially really liked Loaded but I'm noticing more and more that there's actually a brown undertone to it. It's very similar to MAC Club, at least in pictures. I need to find a true Deep Emerald green eyeshadow as I love the color. Any suggestions?

*Kat*