skip to main |
skip to sidebar
Ever since discovering Incoco Nail Polish Strips, I've been loving doing manicures. I know that I just posted my festive, Christmasy NOTD, which was okay but I felt was a little too busy and too much for my preference. I had to change out of it and decided to use what I think is one of the more popular designs as I can't find it in stock very often. This one is called Ballerina Princess.
I thought that it was pink when I first bought it but after looking at it better, there is a lavender hue to it. After applying it to my nails, it shows up much more and it's so pretty! There is a hint of fine micro glitter in it, which isn't visible in the picture but shows up really nicely especially in natural sunlight.
I thought Golden Lattice from my first post was my favorite but I believe that Ballerina Princess is my favorite. It is a beautiful pink-lavender shade with light gradation.
I did find that this set of nail polish strips seemed to be of a little different consistency from the other two that I used. It felt thinner, seemed more tacky and stretched more easily. Because it seemed to be more tacky, it adhered to the nails really quickly and firmly. Also because it stretched more easily, it was a little more difficult to use the other half of the strip on the other hand. I had some problem with it crinkling. It's good to make a mental note that if the strips seem to be of this type of consistency, it might be better to not try to use one strip on two nails.
*Kat*
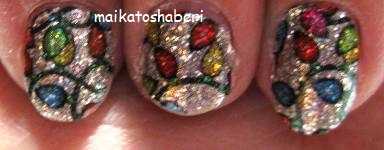
Since I mentioned in last night's post that I bought a Christmasy Incoco nail strip set, I thought that I would post about it today since I couldn't find it last night to take a picture of it. There were several different designs available, but I liked this one the best.
I applied the nail strips and about a half hour after I was done, I went to shower, washed my hair and dried and styled it. I then took this picture.
As you can see, it still looks freshly applied with no tip wear or chips. There's no way that I would have the same results if I used bottled nail polish. Sorry my middle nail is short because it tore off earlier today when I had no nail polish on. I now have festive nails, ready for the holiday season.
*Kat*
Again, sorry for the lack of posts and slow responses to comments. I've been sick for about a week now but in actuality have not been myself for several months. I finally went to the doctor yesterday and while I don't have a sinus infection, I do have sinus congestion so he told me take a different decongestant and prescribed a nose spray. In just 24 hours, I feel great! I don't feel like I'm in a fog anymore, don't have a dull headache and can actually breathe in air unconstricted. I didn't realize that I wasn't breathing in much air before. I'm actually feeling a lot like my old self and have energy again.
As promised a few posts back, I am here today to do a comparison between the Incoco brand nail polish strips and Sally Hansen nail polish strips. It was in this post that I showcased my NOTD using Incoco. This is my manicure after nearly two weeks of wearing it.
As you can see, my nails had grown and actually were getting too long that they were bugging me. It was time to cut my nails and remove this manicure. I'm always amazed by how long lasting these polishes are because I normally chip my nails within the first 24 hours.
This is what the Incoco nail strip packet looks like.
The cost of the pack is $13.00 but if you buy 3 or more, the cost goes down to about $10.00 each. (There are two sets of the strips in the pack.) Also included, but not pictured, is a mini cuticle stick, an emery board, nail polish remover packet and some sample nail strips. The sample nail strips come two strips to a pack. These are great for if you are first starting out with this system because it gives you a chance to play with it and not use your pack to do the trial.
Sally Hansen nail strips is in a box and is like this:
What is not pictured is the 2nd packet of nail strips. The cost of it is an average of $10.00 per box. It also includes a cuticle stick and an emery board.
My nails after applying Sally Hansen nail strips.
For Sally Hansen, when I was peeling the nail strip off of the backing, it didn't peel off cleanly. Part of the side of the strip stayed stuck on the backing. For me, that is no problem because I have really tiny nails but for those with wider nails, it might be a problem if it sticks like that. I don't know if this means that there is more sticking power to it than Incoco, but I didn't experience this problem with Incoco.
A blogger friend commented that she can't apply the Sally Hansen nail strips because it looks bumpy on her. I didn't have this problem either although I did find that I couldn't reposition the strips after it stuck to my nail. Again, it could be that it just has more sticking power to it than Incoco, which in some ways is good. With Incoco, I am able to put it on lightly and slowly and carefully manipulate it into position.
I'm not sure if it's my imagination or not but I also think that Sally Hansen is thicker or has a more plastic-y feel to it than Incoco. The length of each strip is the same for Incoco and Sally Hansen. If your nails are relatively short like mine, I find that I can use one strip for both hands' nails. For example, I can apply the pinky-sized strip to my right hand, flip it around and apply it to my left hand. This way, each pack will last for two manicures instead of one. You can view Incoco's "how to apply" instructions here. While it does take some practice to apply it easily, for me it is so much better than spending time painting my nails and waiting for it to dry completely. I always end up smudging it or ruining it somehow. I also have problems waiting for each layer to dry properly so that's probably why it chips so easily.
My own personal opinion is that I prefer Incoco over Sally Hansen. Somehow, it just feels like it's a better quality nail strip. I think that Incoco's collection of designs and colors, are much more elegant than Sally Hansen's. Sally Hansen has glittery strips that are really glittery or design prints that are actually quite busy, like the one that I applied. Both wore well on me and lasted nearly two weeks before any chipping or peeling occurred. That is a miracle for me because I use my hands a lot and am really rough on my nails.
In Hawaii, there is an Incoco kiosk at Ala Moana Shopping Center, which is where I first discovered this nail polish concept. A kiosk just opened at the mall which is close to me, which is a good and bad thing. I just purchased a Christmas design, which will be my new manicure. Unfortunately, I don't know where I put it so I can't take a picture of it right now.
Have you tried either or both? What are your thoughts about it?
*Kat*
Hi there! Long time no blog. Sorry for the lack of posts recently. Real life has had some hiccups along the way and it's also starting to get busy for me as the holiday season starts to come upon us. There are several reviews that I want to do and will do in the near future.
Today, I was going to do just a review of Wet N Wild Mega Liner but I decided to also do it as a comparison with my HG liner, K-Palette Real Lasting Eyeliner.
First of all, the one big difference is the price. Wet N Wild Mega Liner is only $3.99 here (will probably be cheaper on the continental U.S.) and K-Palette is around $15.99, depending on where you purchase it from. I bought the one pictured from iMomoko. It is a Limited Edition one because it is in the pink tubing. It normally comes in black tubing. The other difference is that there is a shaker mechanism in the tubing for K-Palette but none in Wet N Wild. I think that the shaker mechanism helps to keep the liquid fluid and flows better.
The saying that you get what you pay for holds true for this product. It was a disappointment for me in that the product does not come out evenly or nicely wet. It actually is a bit stiff and dry--kind of like a drying marker. It was also interesting that it didn't come out well because the tip of it is much thicker than the K-Palette.
If you work at it and layer it, then you'll get the kind of deep, dark lining that you would normally get with one swipe of K-Palette. I didn't want to work that much so after testing it out only that one time, I went over it with my K-Palette so I can't really review how well it lasts over a period of time.
I find that the Japanese-made pen liners work very well while the American made ones, I do not like. I had also tried Revlon's Color Stay liner and it didn't work well for me. While Physician's Formula may not be a Japanese brand, their pen liners are made in Japan and I find that it works out nicely too.
I'm going to add a bonus NOTD here. I normally do not do my nails on a regular basis because I can't seem to paint my nails and be patient enough for it to dry. I always end up smudging it. I also love how Konad works but can't seem to do it either. Thanks to Incoco, I am able to do manicures with nice designs. This is my current manicure and I really like this design and coloring.
I know that Sally Hansen has nail polish strips like Incoco and I've used it once but didn't really test it out well. I'll do a review and comparison in the near future too.
*Kat*
I forgot to post this with my previous Wedding Day FOTD. I did this manicure about a week ago, which was a few days before the actual wedding.
This glittery pink french manicure is actually using the Incoco dry nail polish, which I had first used about a month ago. I am really hard on my nails so my manicures usually last me only a day or two before showing tip wear and/or chipping and peeling. The Incoco system has worked out really great for me since it lasts at least a week. The regular manicure lasted me just about 2 weeks before chipping. As you can see in the picture, even though it's been on me for a week, there really isn't any tip wear or chipping. I have done dishes, cooked, cleaned and scrubbed, even assembled and disassembled the arch for the wedding. It's really amazing to me. You can purchase it online although I made my purchase at a kiosk at Ala Moana Shopping Center.
My nails are quite soft and bend and tear easily. The length which is pictured above, is usually the longest that my nails will grow before tearing off.
NOTE: Today, the day after I took the picture, my middle finger's nail bent and then broke off. It's a good thing that it happened after I took the picture.
*Kat*